

Act 1 - The Mud Flats
12 / 6 / 2019
# Previous Area
# Intro
In this guide our subject is The Mud Flats, the fourth zone of act 1 which is known for making people run around the area searching for three Glyphs required to open the passageway to The Submerged Passage. Fortunately, there are somewhat fixed spawn points for these Glyphs that can be always be picked up in a way that minimizes backtracking.
There is a total of 6 distinct layouts for this area, or 3 depending how one wants to differentiate them. For the purpose of this guide, we will be separating them to 6 different layouts. You can deduct at least half of the possible layouts immediate upon entering based on the orientation of entrance, and later by the placements of the nests containing the glyphs.
While you can follow the little streams between the nests, they can sometimes lead you to a wall or to the river resulting in the need for backtracking for the other nests. Because of this reason, It's better to just learn the few different rulesets to follow depending the layout you are in, which is very fast to recognize.
# Orientations
Shown below are the two different starting orientations for this area:
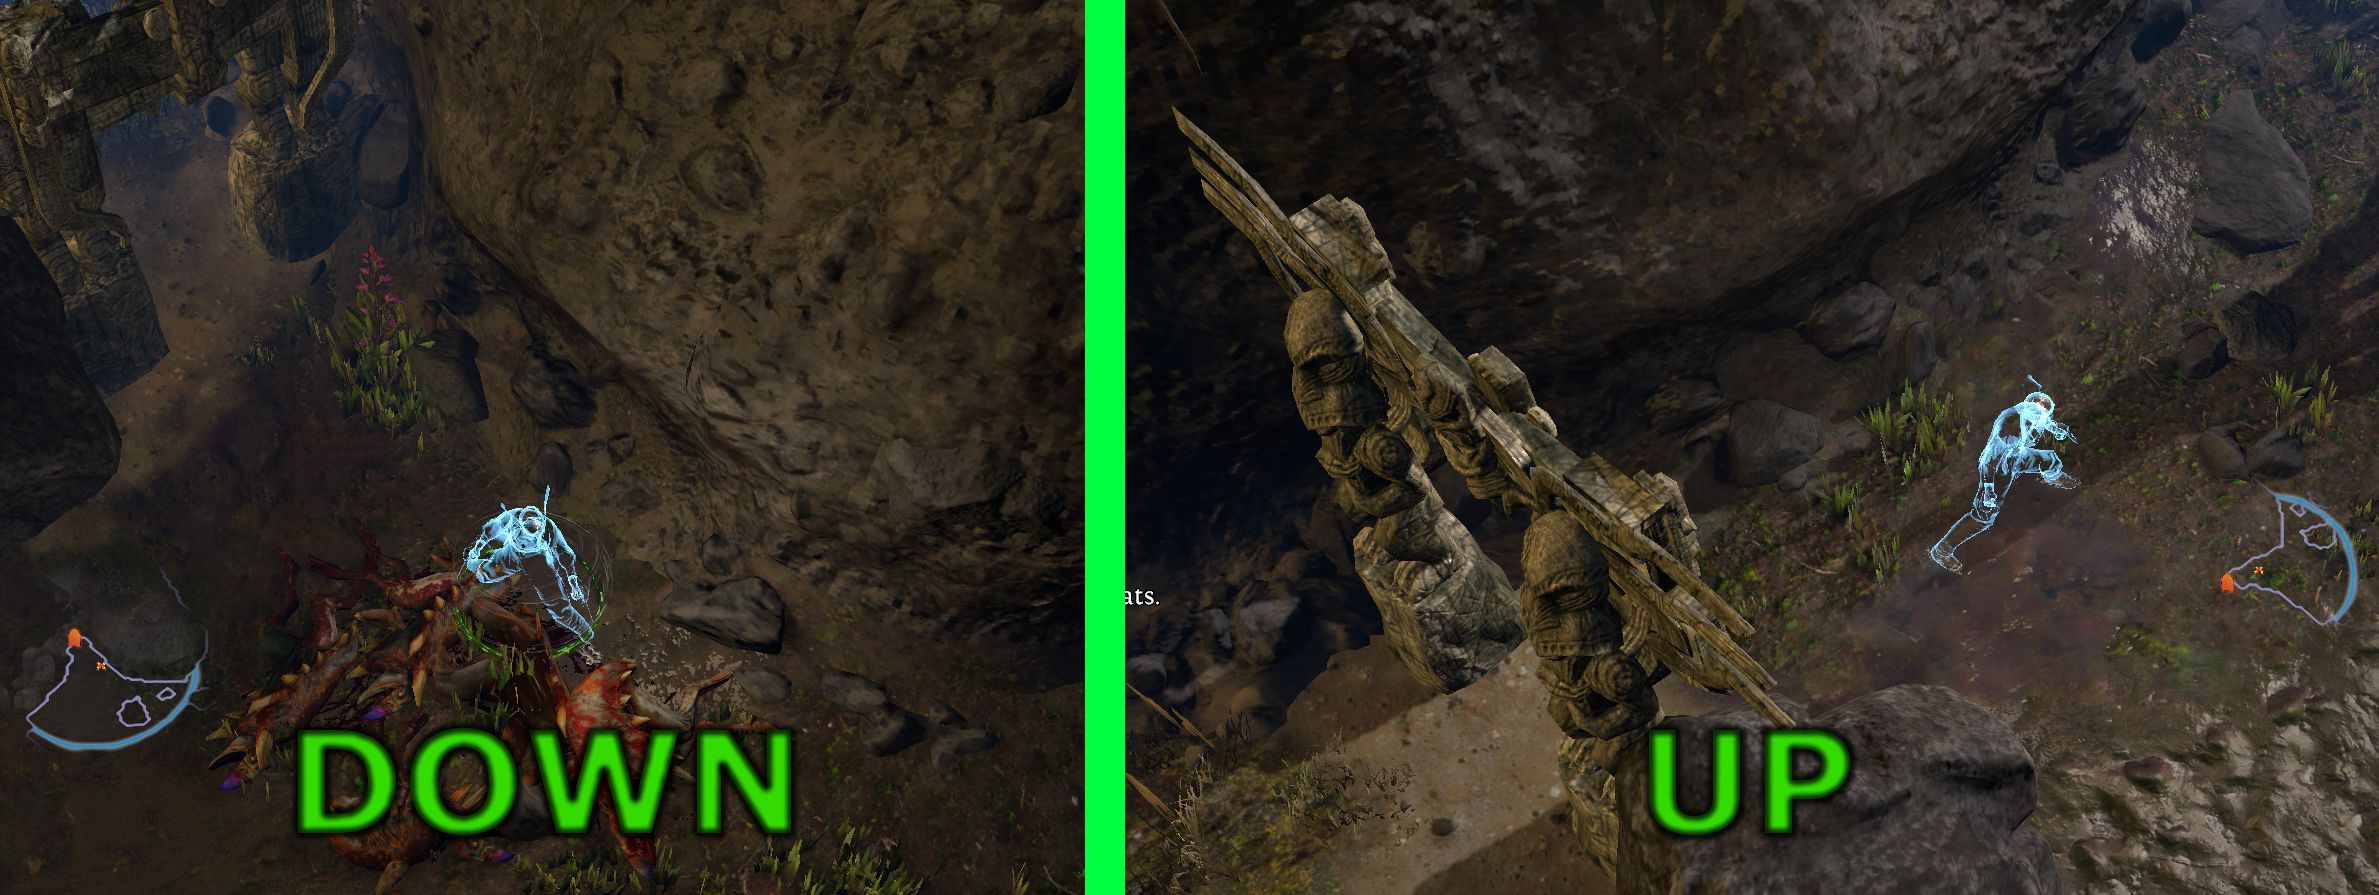
If you were to draw a line with an arrow pointing towards the direction the character is heading after exiting the entrance, in the Up Orientation it would be pointing towards top right corner of the image, or shortly put top. And in the Down Orientation it would be pointing towards bottom right corner of the image, or down.
Just by recognizing the starting orientation you can already deduct at least half of the possible layouts, so it's very useful to know.
- Up orientation has a total of 3 layouts
- Down orientation has a total of 3 layouts
# DOWN
If you were lucky enough to start with the down orientation, you now have to worry about 3 different layouts, which in this guide we refer to as:
- Top
- LeftBottom
- LeftTop
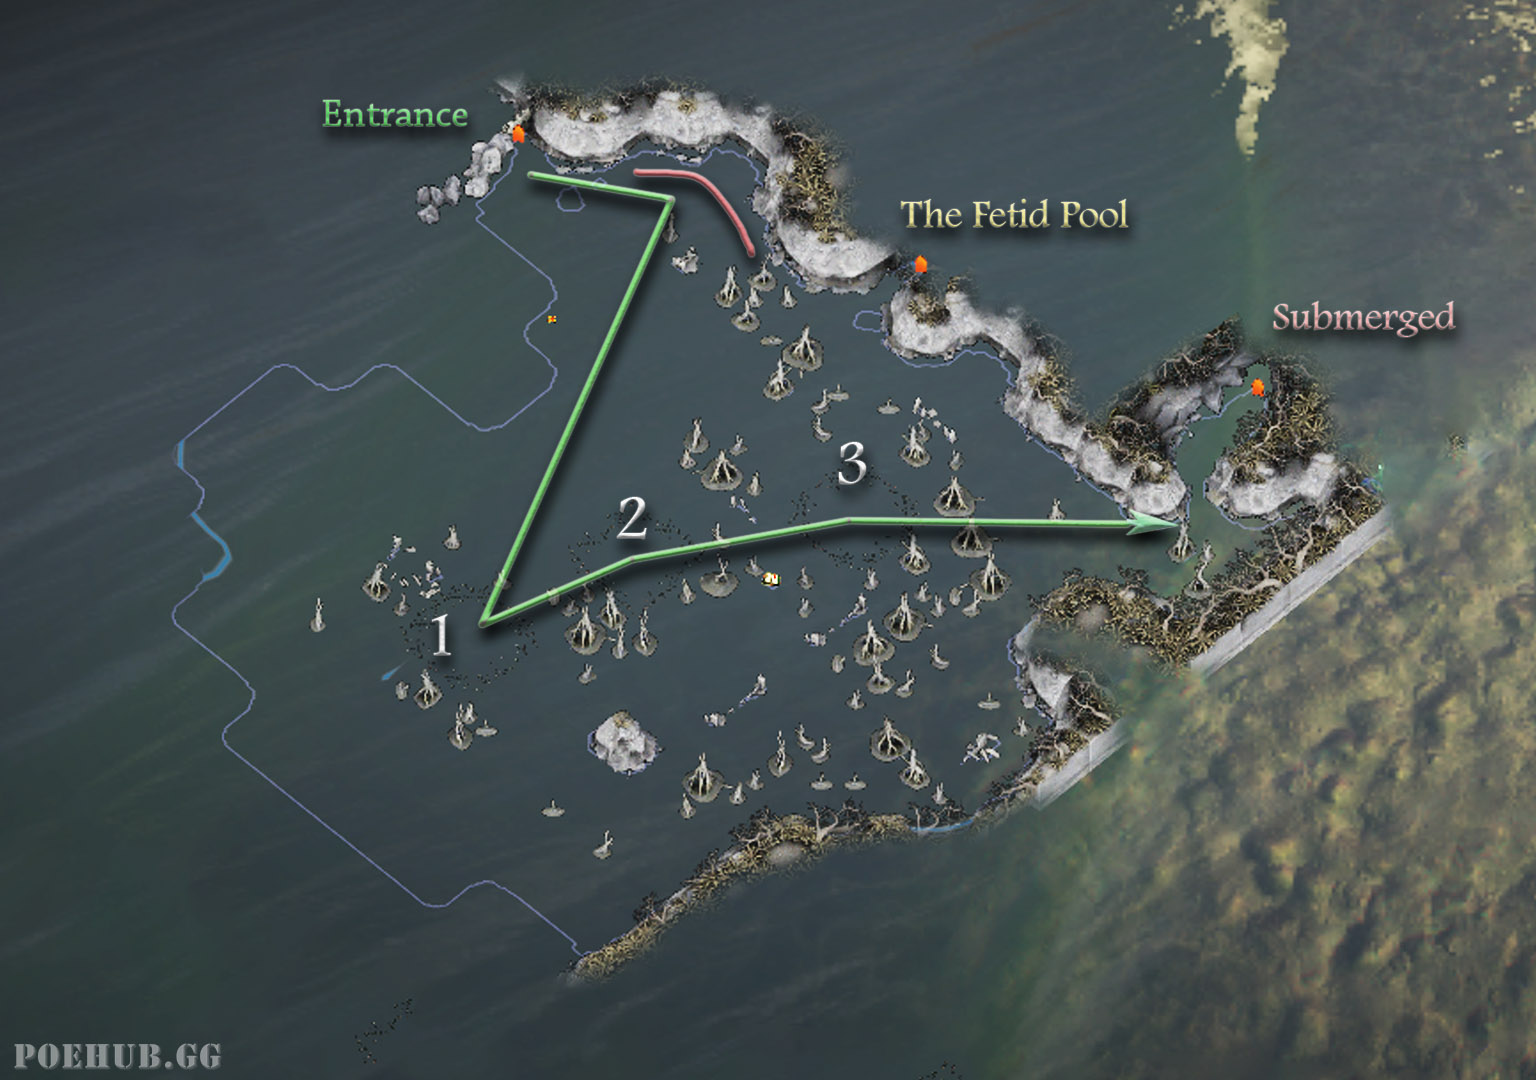
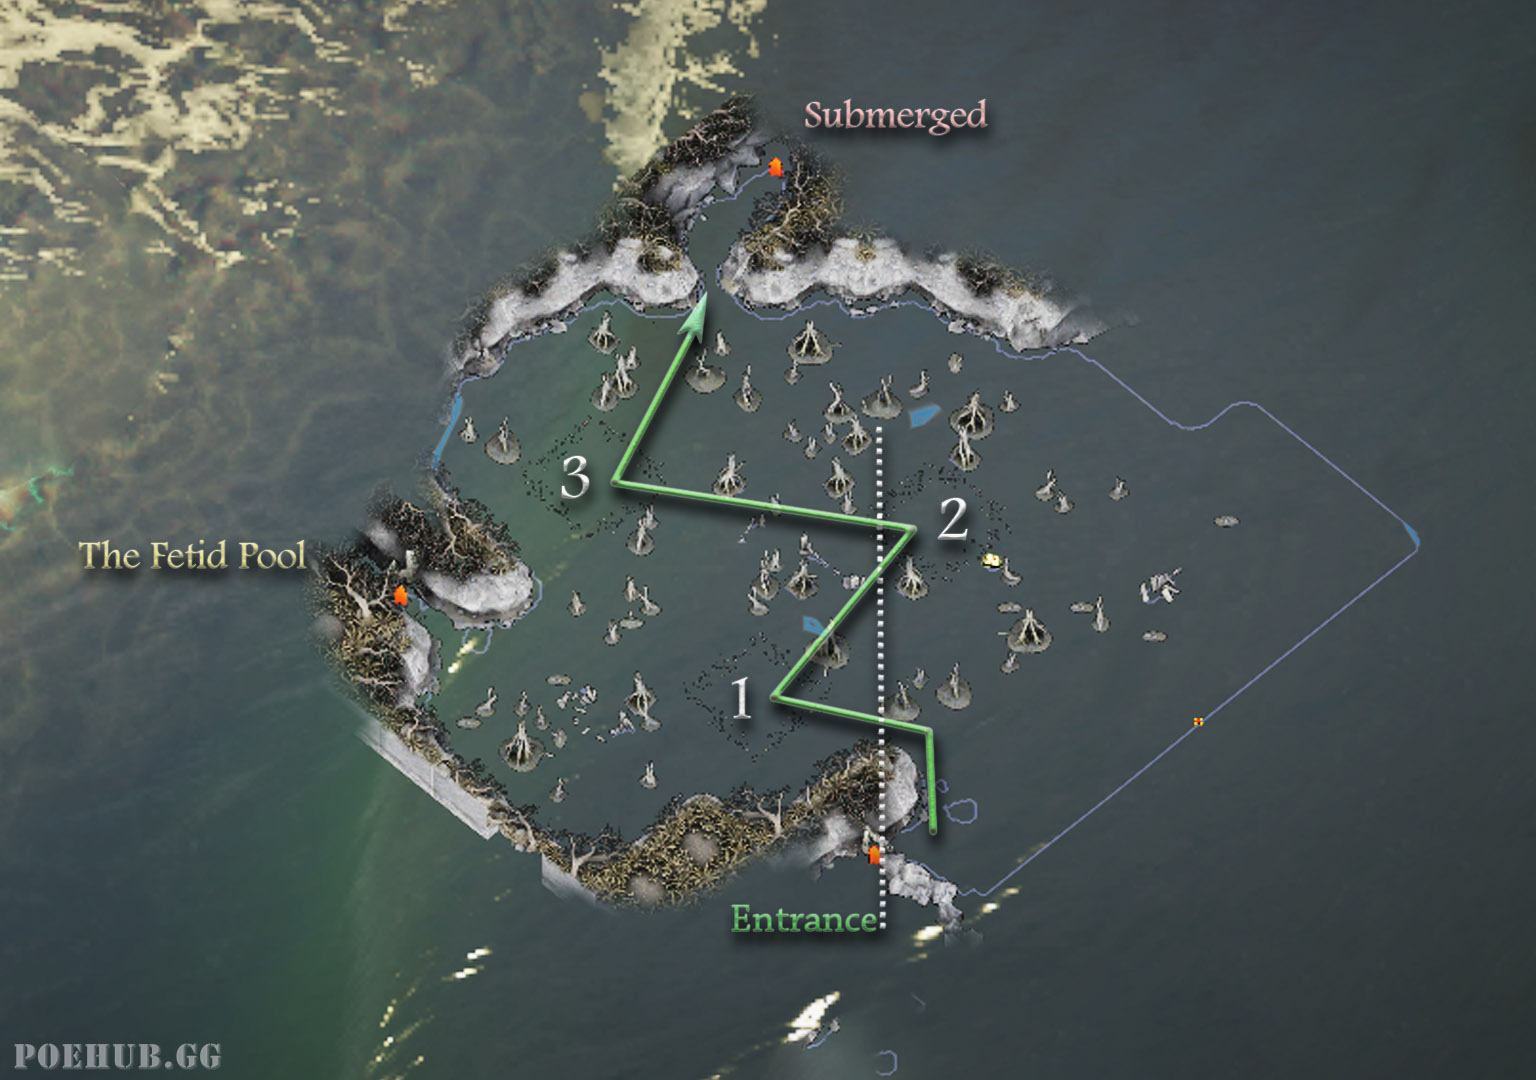
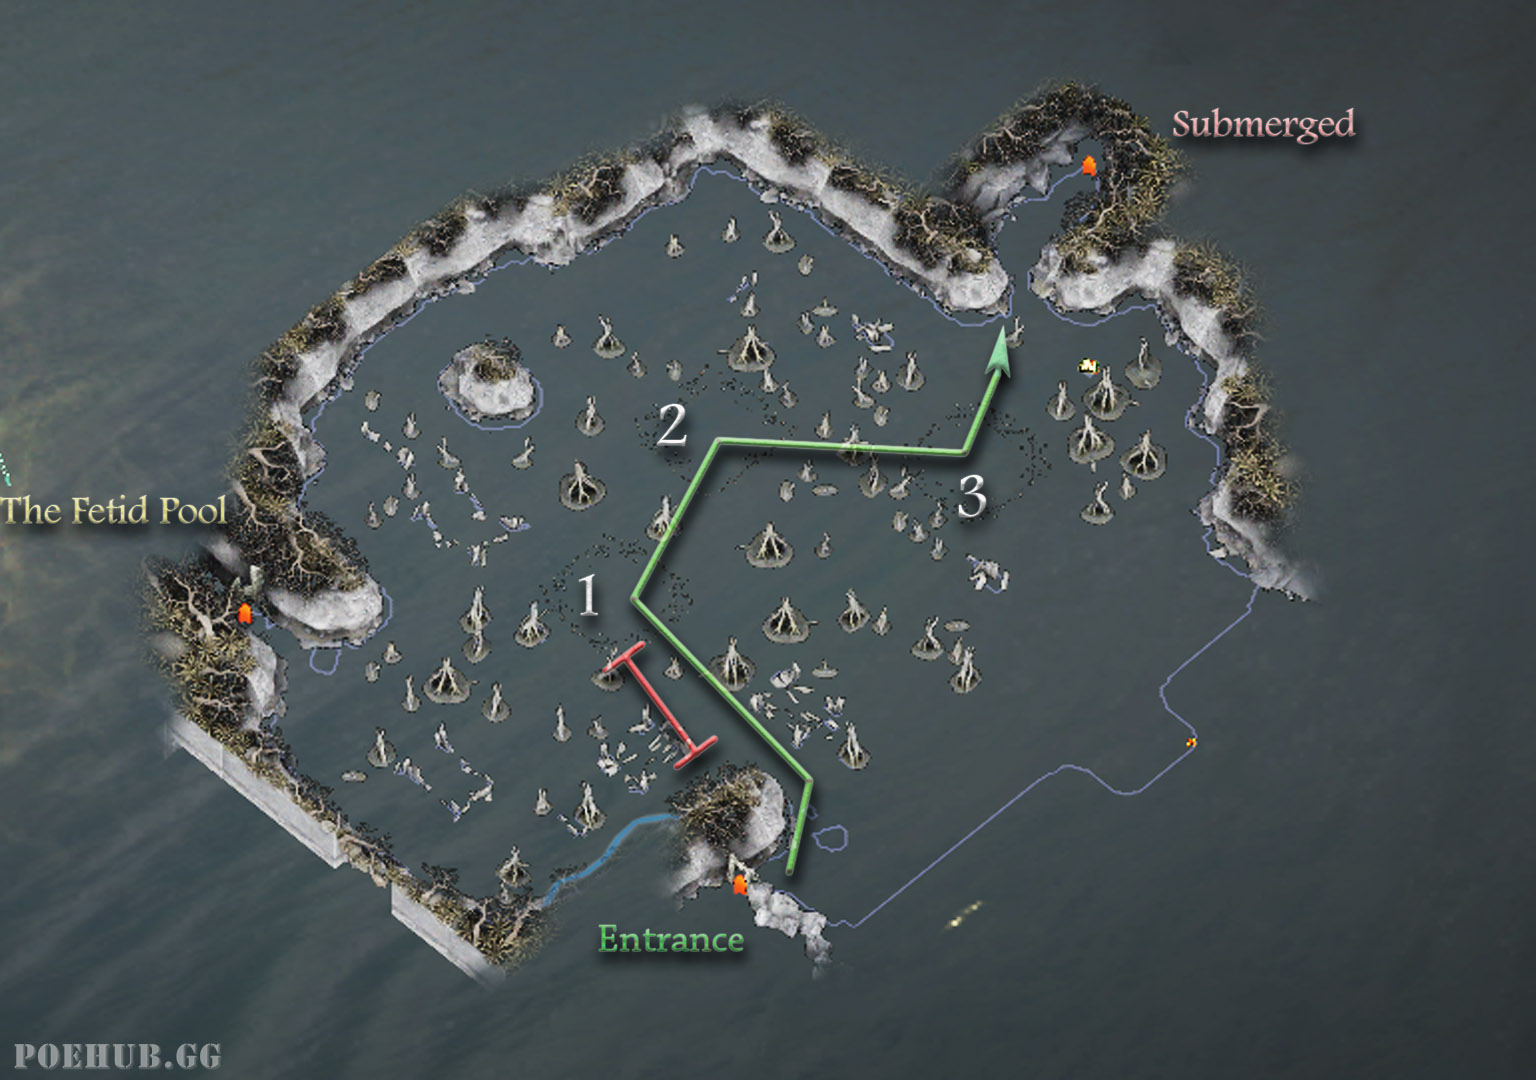
# Top
The first and easiest layout of the down orientation Top layout, named based on the fact that we start at the top of the area, where you will very quickly notice that there is no way to go North at all, and you're very quickly pushed towards South or South-East if you kept going East. You can tell you're in the Top layout just from the fact that there is no walkable area generated North of the entrance.
Once you know the layout is Top, you simply go South and slightly tilted towards West, because sometimes if you go straight South you will end up on the middle nest which results in unnecessary backtack. It is also the best way to get the confirmation that there is a nest below the first one, because if the nest isn't there, it will be below the other nest. You know you've gone enough to West when you meet/pass a vertical line drawn from the entrance (black line in the image below)
# LeftBottom
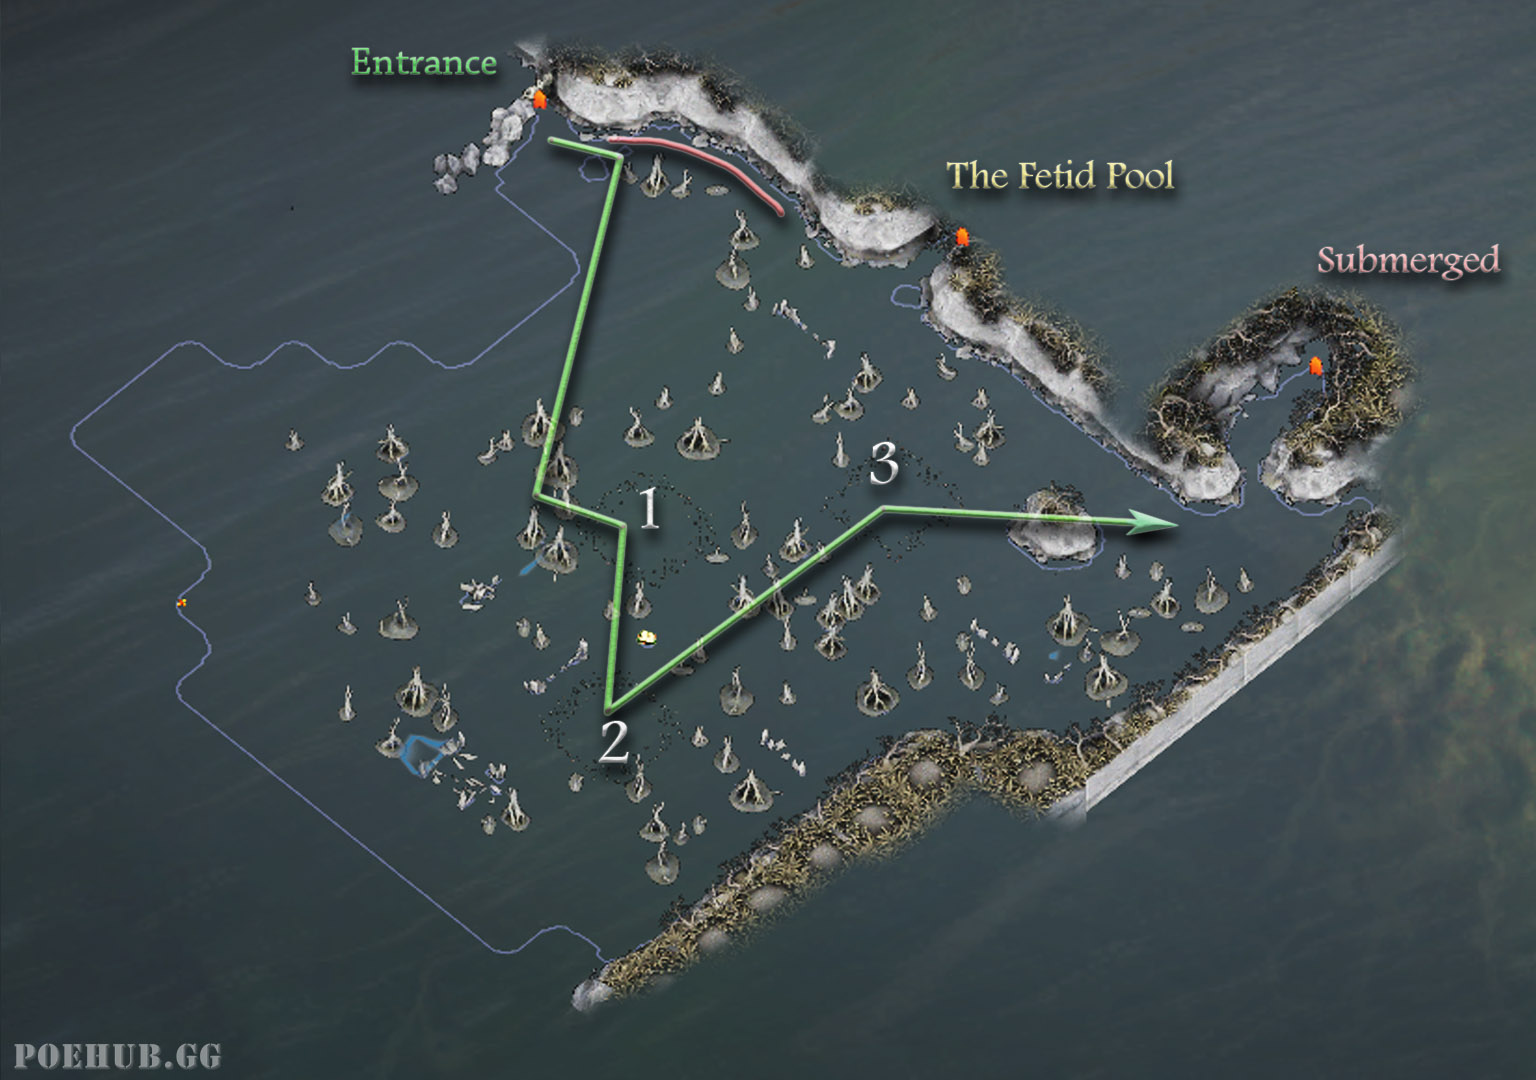
LeftBottom is named based on the entrance being on the left corner of the area, and the exit being behind a corner you have to circle around to after getting the 3rd glyph.
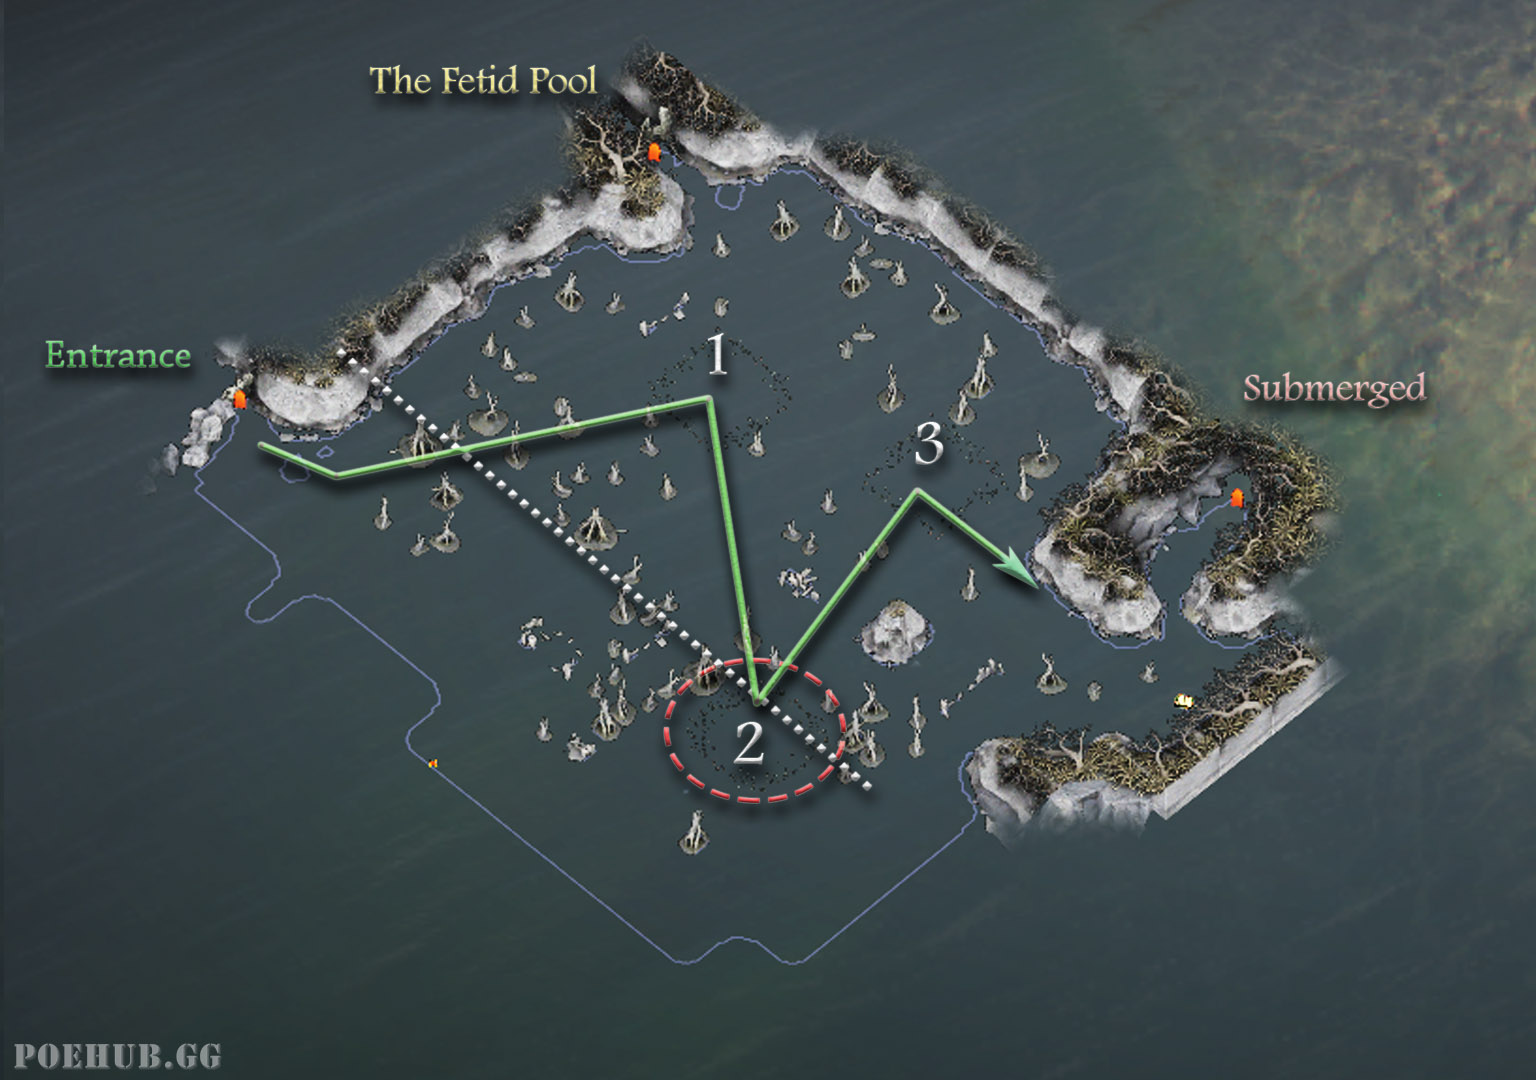
- The general rule of thumb in this area is to always path the nests from 1 -> 2 -> 3, however in the image on the right side you can se that going from the 2nd nest would be slightly faster.
- It's recommended to always clear LeftBottom layout like this as there are few nest spawns that would make you go towards North or North-West after taking the 2nd nest.
- If the 2nd nest crosses the white dotted line, you know the exit is below the 3rd nest to South-East.
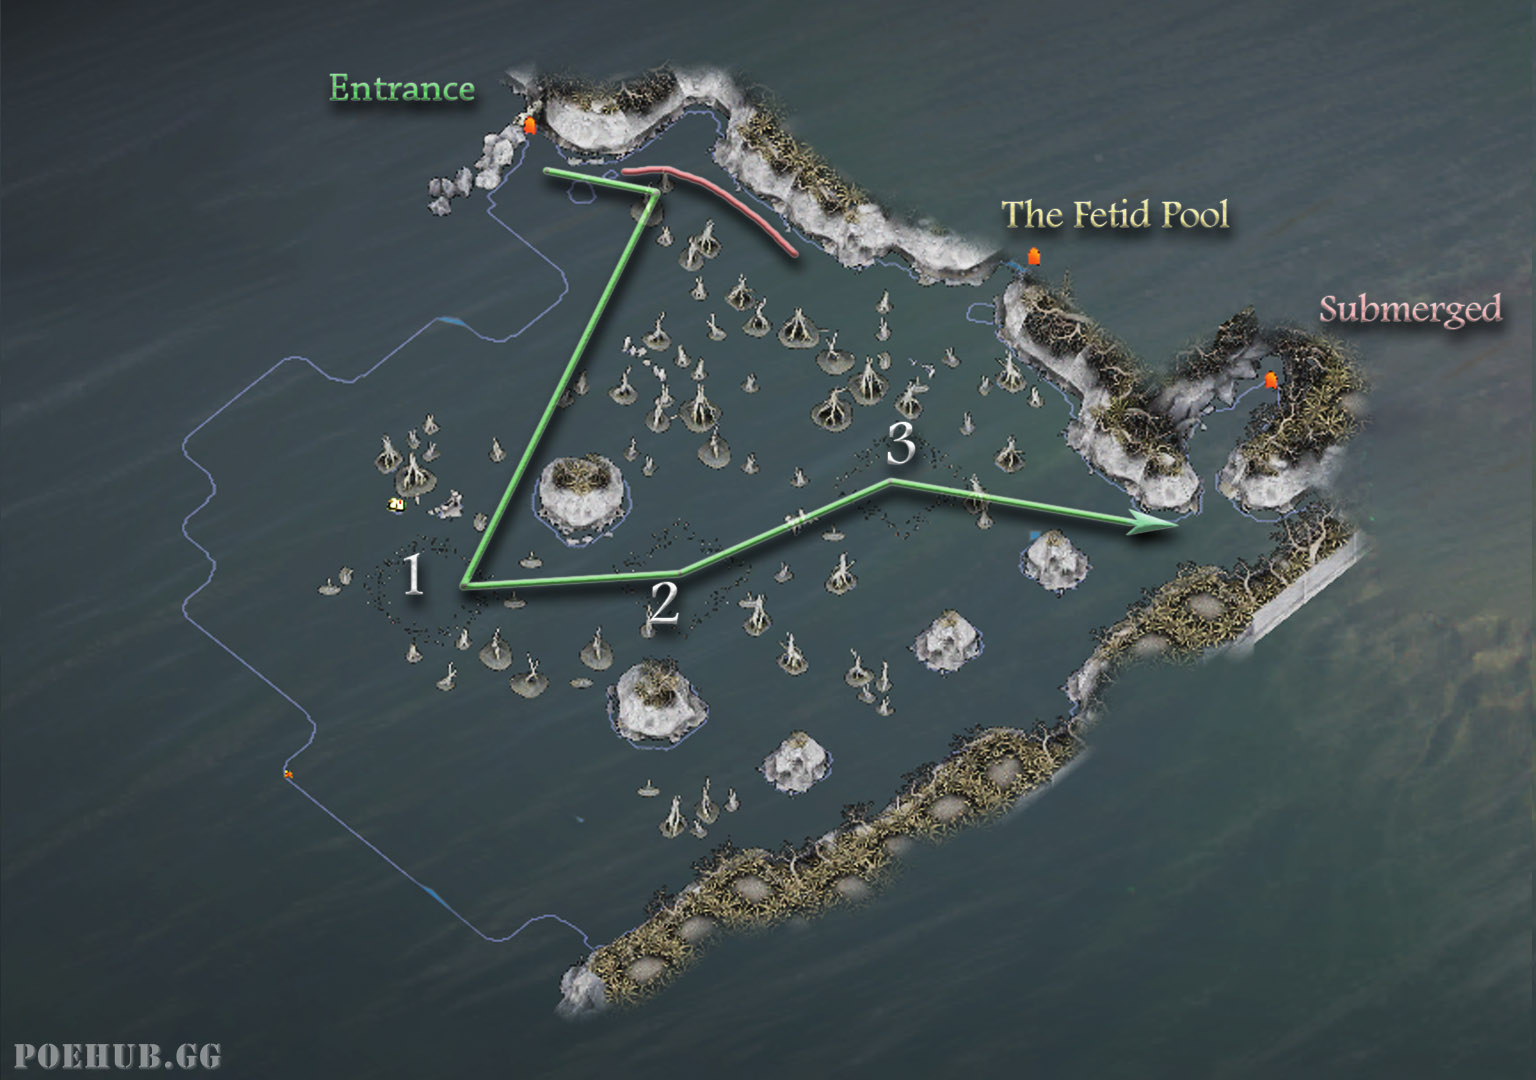
# LeftTop
LeftTop is named based on the entrance also being on the left, however in this layout the exit is North-East of the third nest.
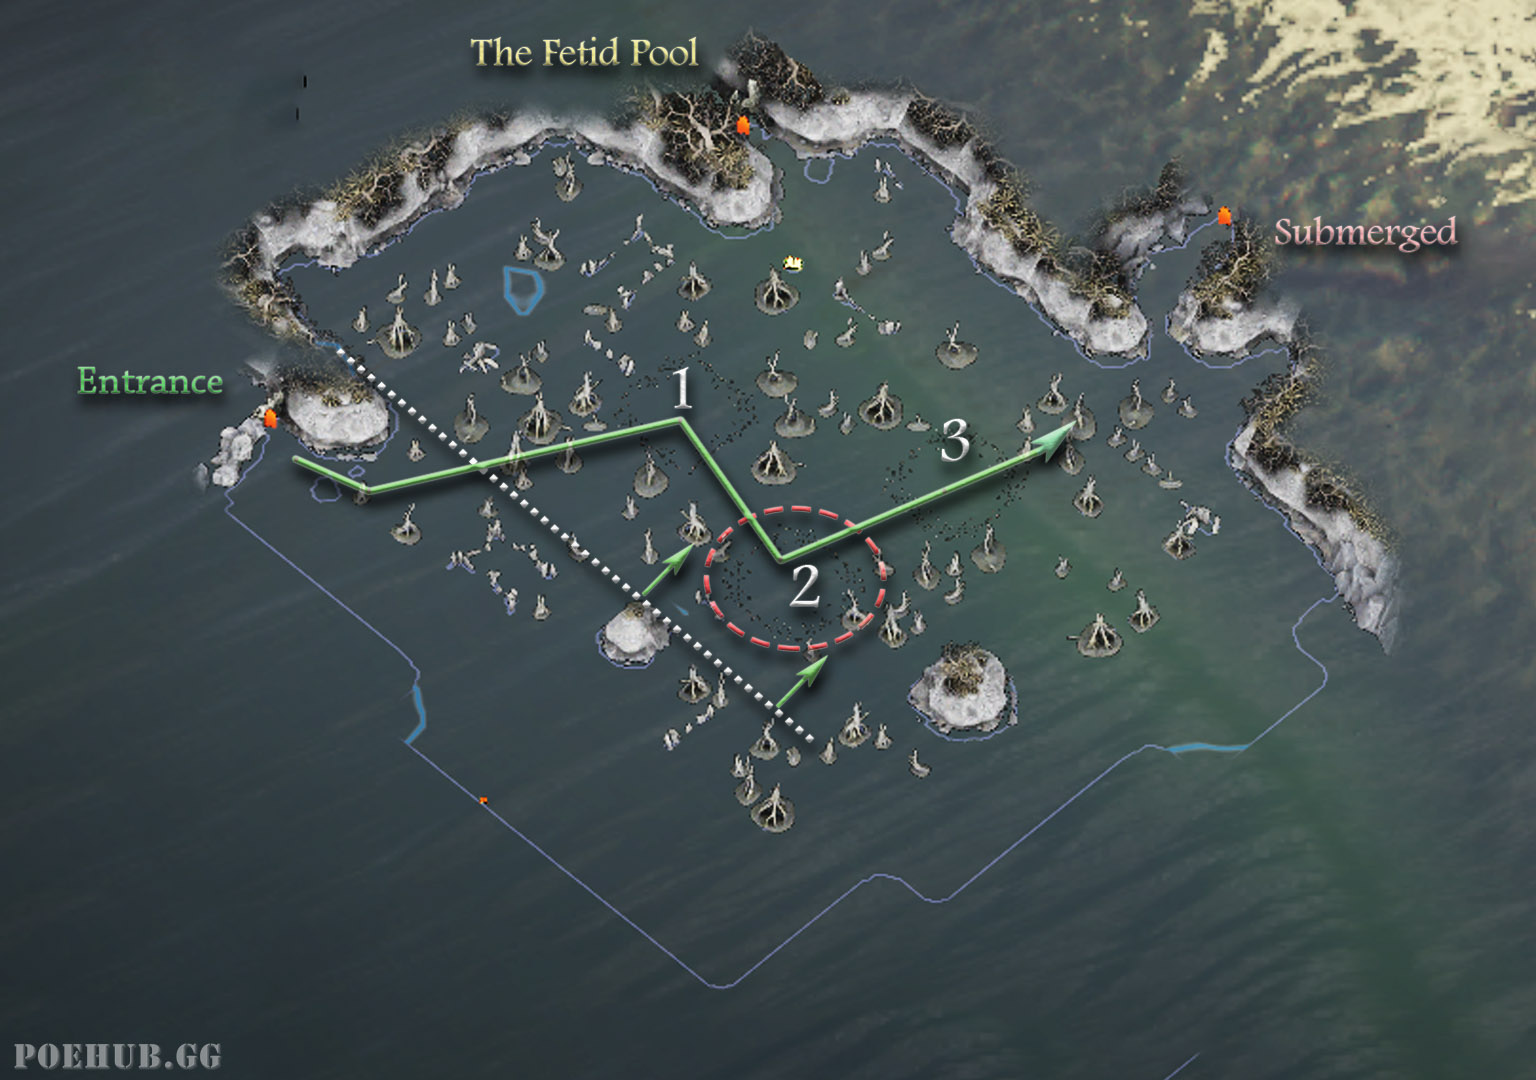
Just like with LeftBottom layouts, you want to navigate through the area by always taking the 1st nest by going slightly towards North while moving towards East.
If the 2nd nest is above the white dotted line, you know the exit is above to North-East of the 3rd nest.
# UP
The layouts where you start at the bottom of the instance with the Up orientation are the most likely the ones you'll be making more mistakes in due to them looking quite similar while actually having 3 different exit locations, and one layout itself has 3 different variations that you kind off have to learn to recognize.
The layouts are:
- BottomLeft
- BottomMiddle
- BottomRight
# BottomLeft
BottomLeft layout has had it's name given by the exit to being to the far left corner.

- The first nest is always directly above and very close to the starting rock. If you were to draw a vertical line from the entrance, the first nest is always inside it
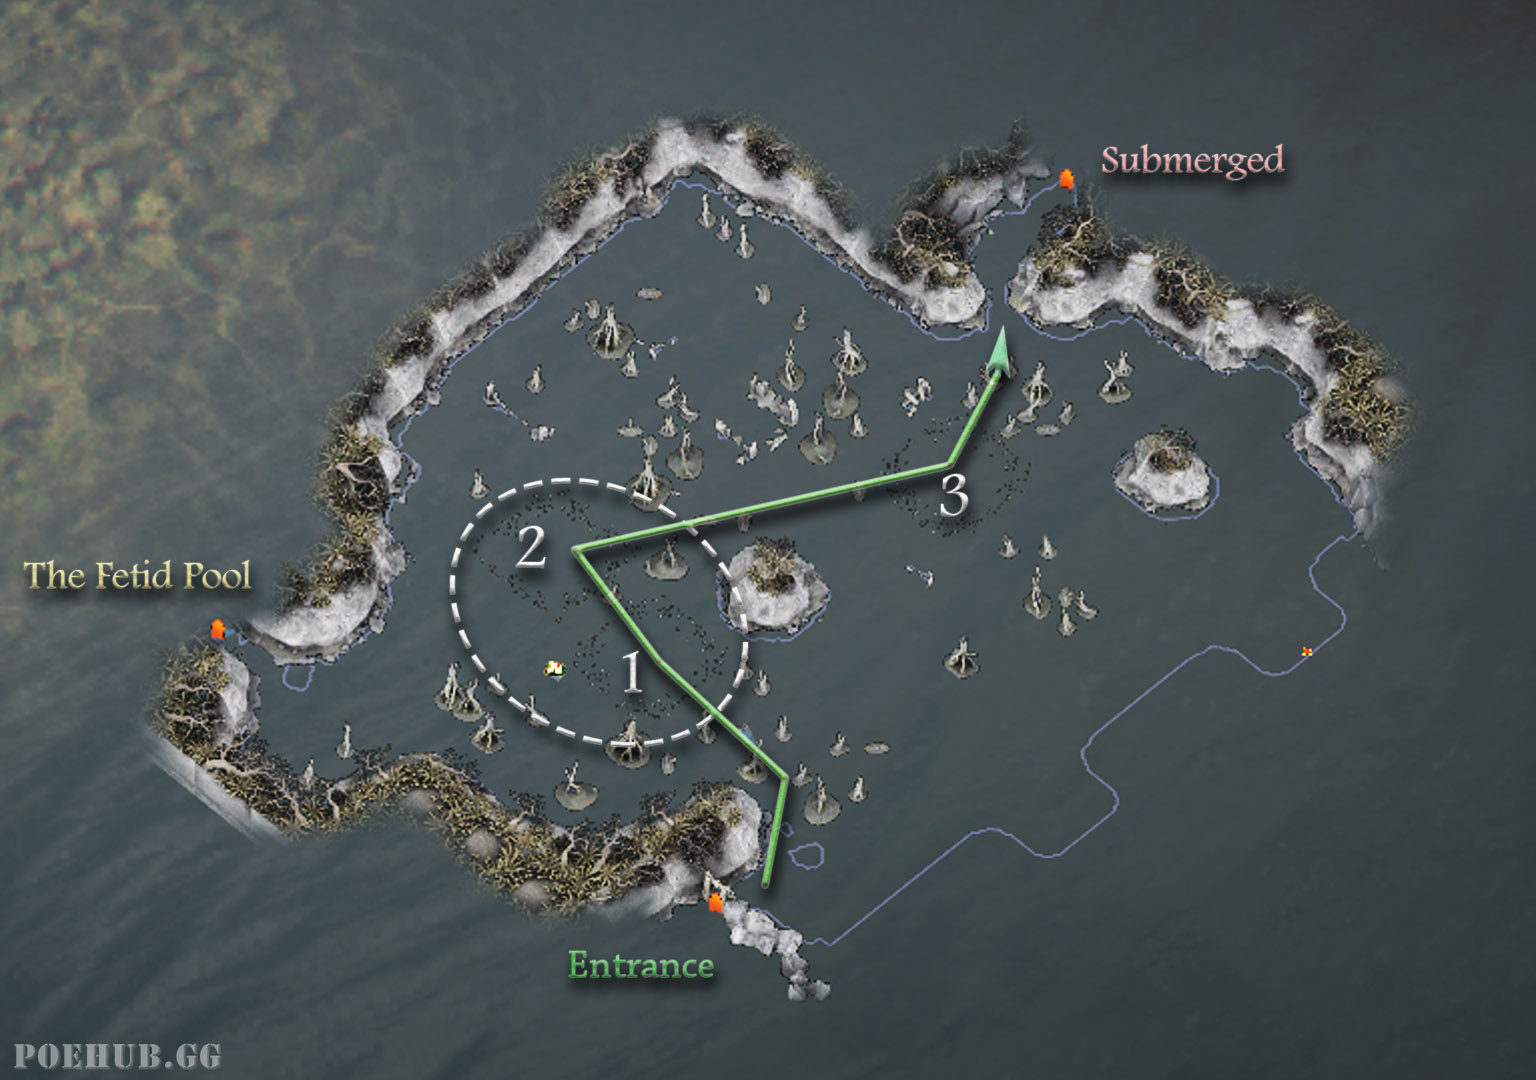
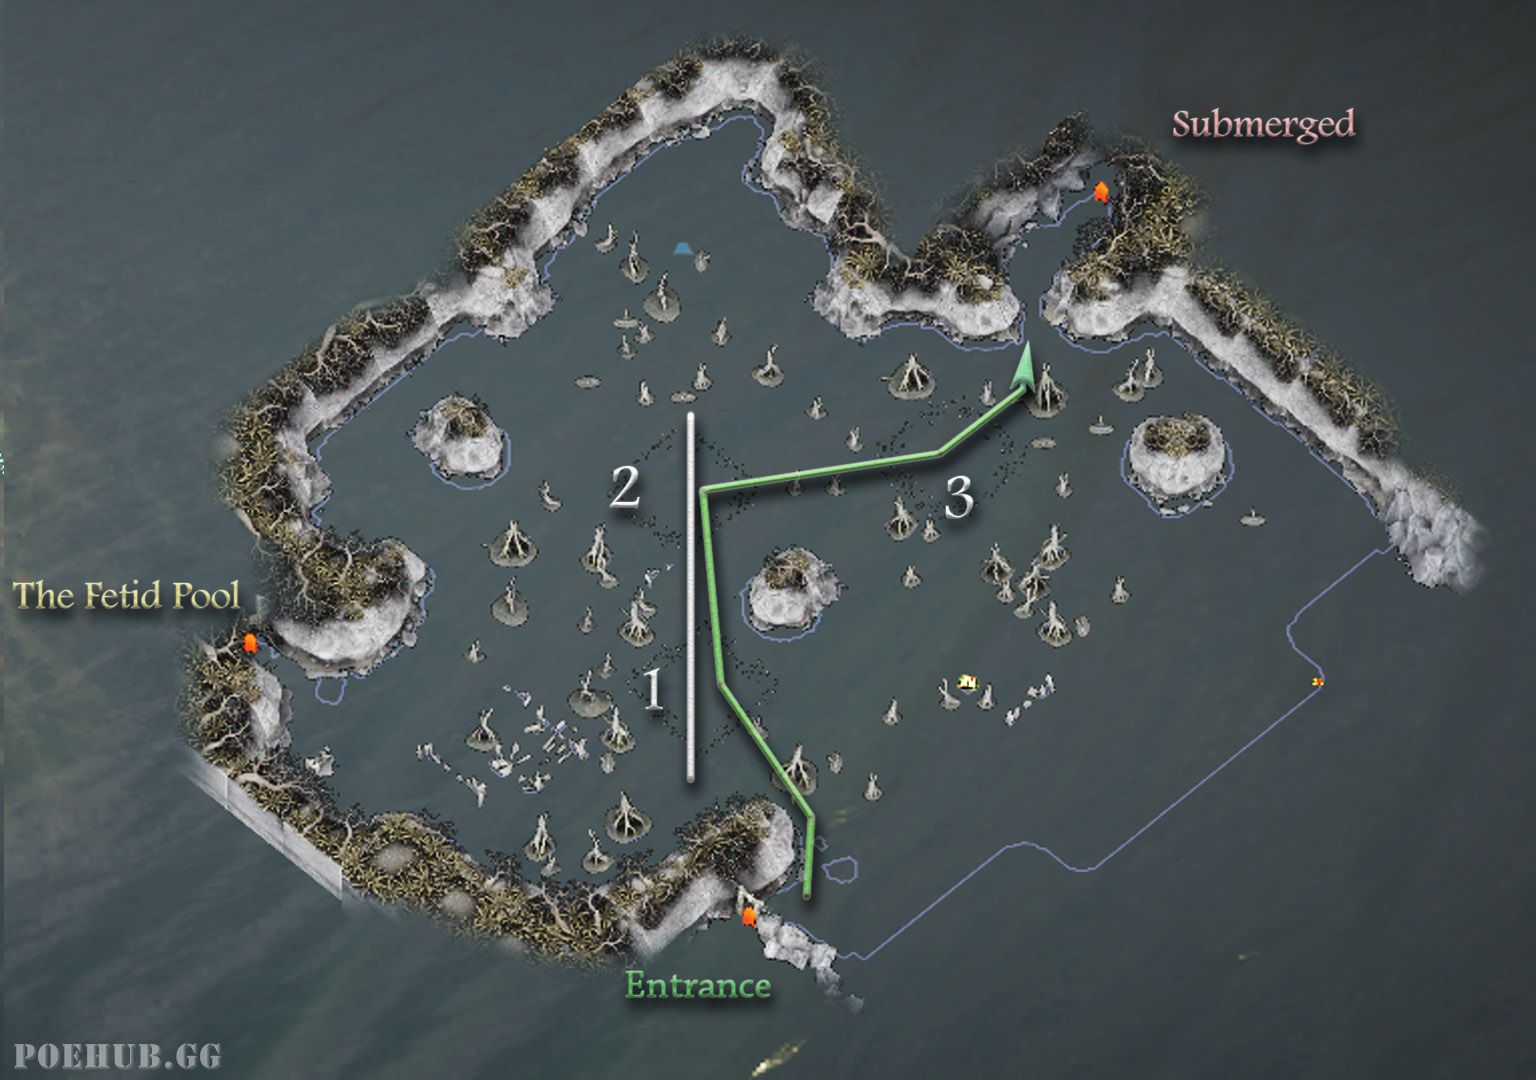
# BottomMiddle
BottomMiddle's exit is between the 2nd and 3rd glyph in the center of the wall.
- While the first nest is again very close to the entrance, unlike in the BottomLeft layout, if you draw that same vertical line, the first nest is always to the left of it instead inside it. This if the tell that the exist is between nests 2 and 3
# BottomRight
BottomRight has it's exist in the far right side. This layout also has 3 different variations within itself, but gladly the tells for BottomLeft and BottomRight don't overlap so it's rather easy to recognize the layout once you've deducted those out of the possibilities. Here's the slightly different variations of the BottomRight layouts:
- In the first image the first and second nest are so close to each other which it's the tell
- In both BottomLeft and BottomMiddle layouts the second nest is never immediately connected to the first one
- The middle image is the one you're most likely to confuse to BottomLeft or BottomMiddle layouts as the second nest is to the North-East of the first one, just like in the others
- However, the distance from the entrance to the first nest is much longer than in both BottomLeft or BottomMiddle layouts, which is the tell that instead you're in the BottomRight layout
- And in the last image the second nest is directly above the first nest
- In BottomLeft and BottomMiddle layouts the nests are never directly above each other like this
# Cheatsheet
Work in Progress