


Act 1 - The Flooded Depths
12 / 5 / 2019
# Previous Area
# Intro
In this guide we're tackling The Flooded Depths, the area that has Gran Daddy Grab to be slain for a skill point sidequest.
# Layouts
While The Flooded Depths can be a nightmare of an area if you end up running to those pesky side deadends, it's actually a very easy layout once you know how to read it, and it isn't too complicated.
The Flooded Depths has 4 different layouts, which we refer to as:
- Top
- Bottom
- Left
- Right
# Top
In the Top layout we start in North corner of the area, and the exit is always directly South of the start.
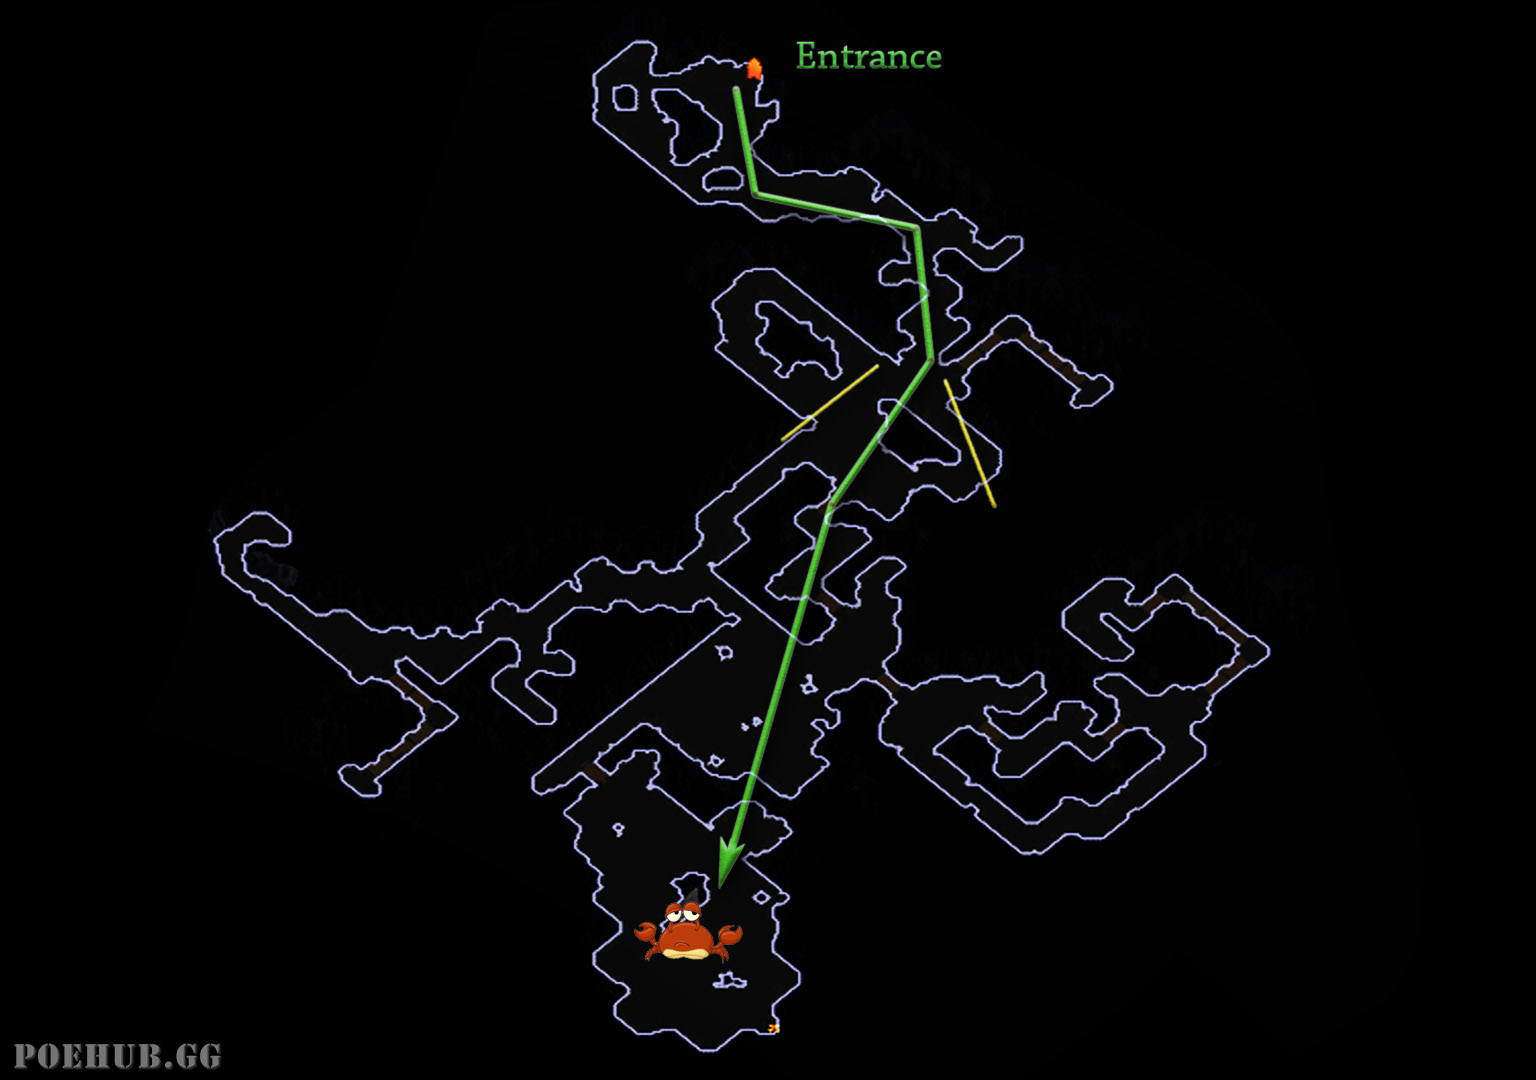
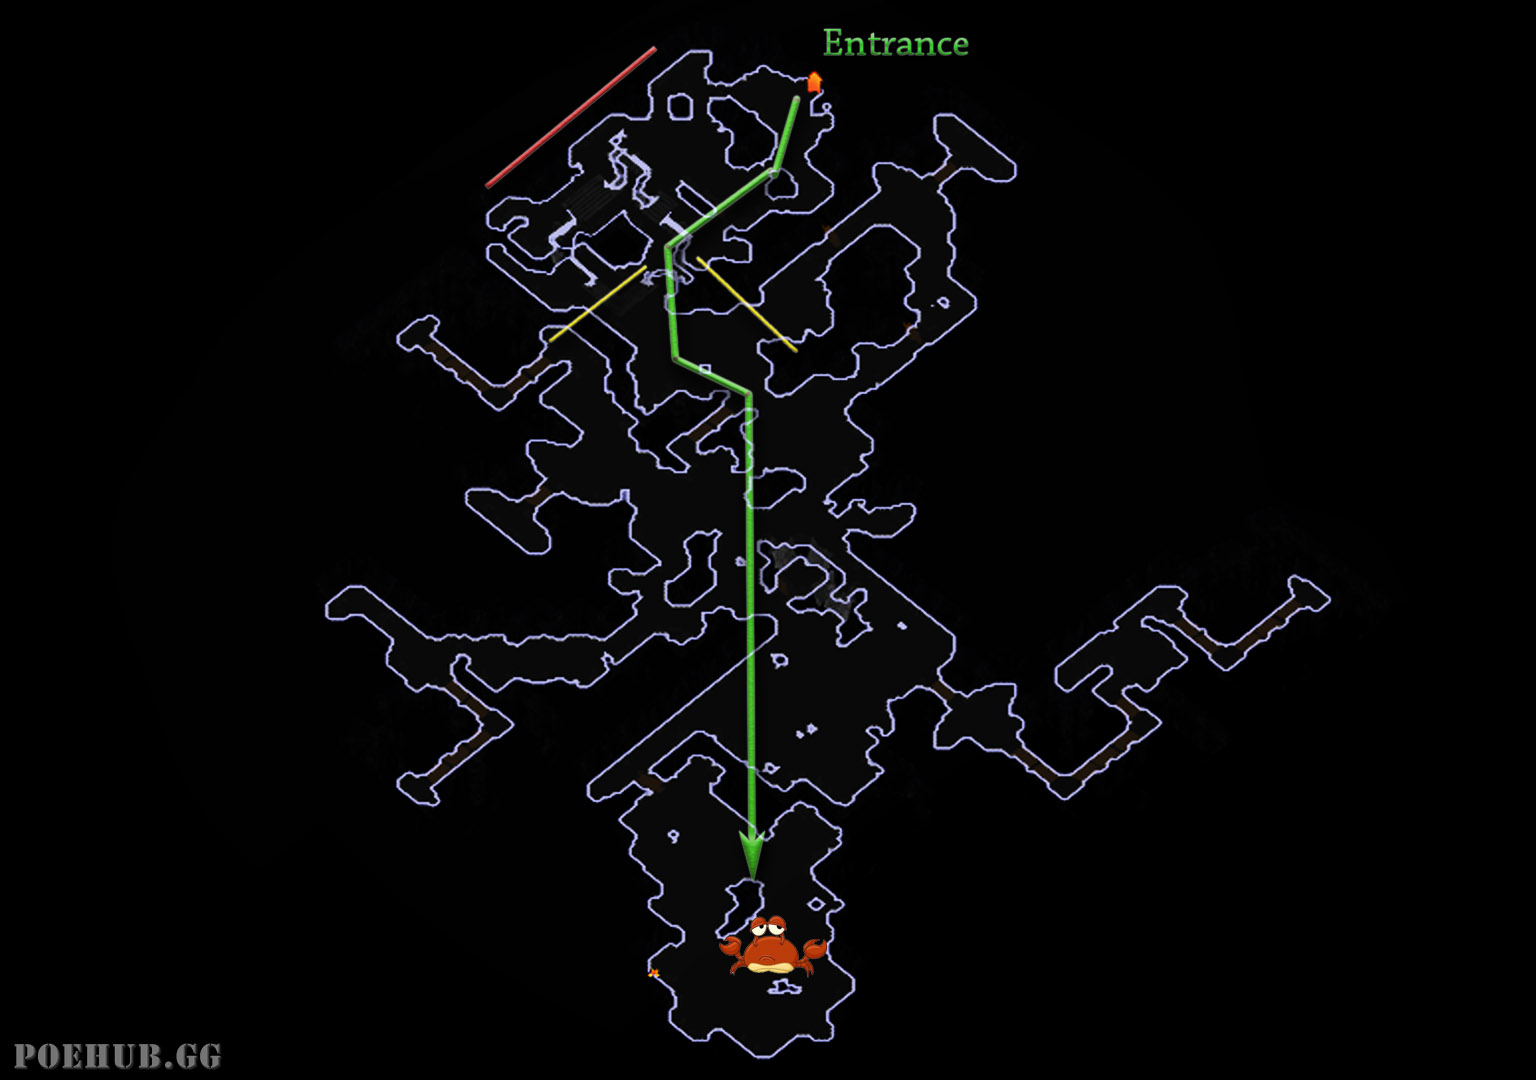
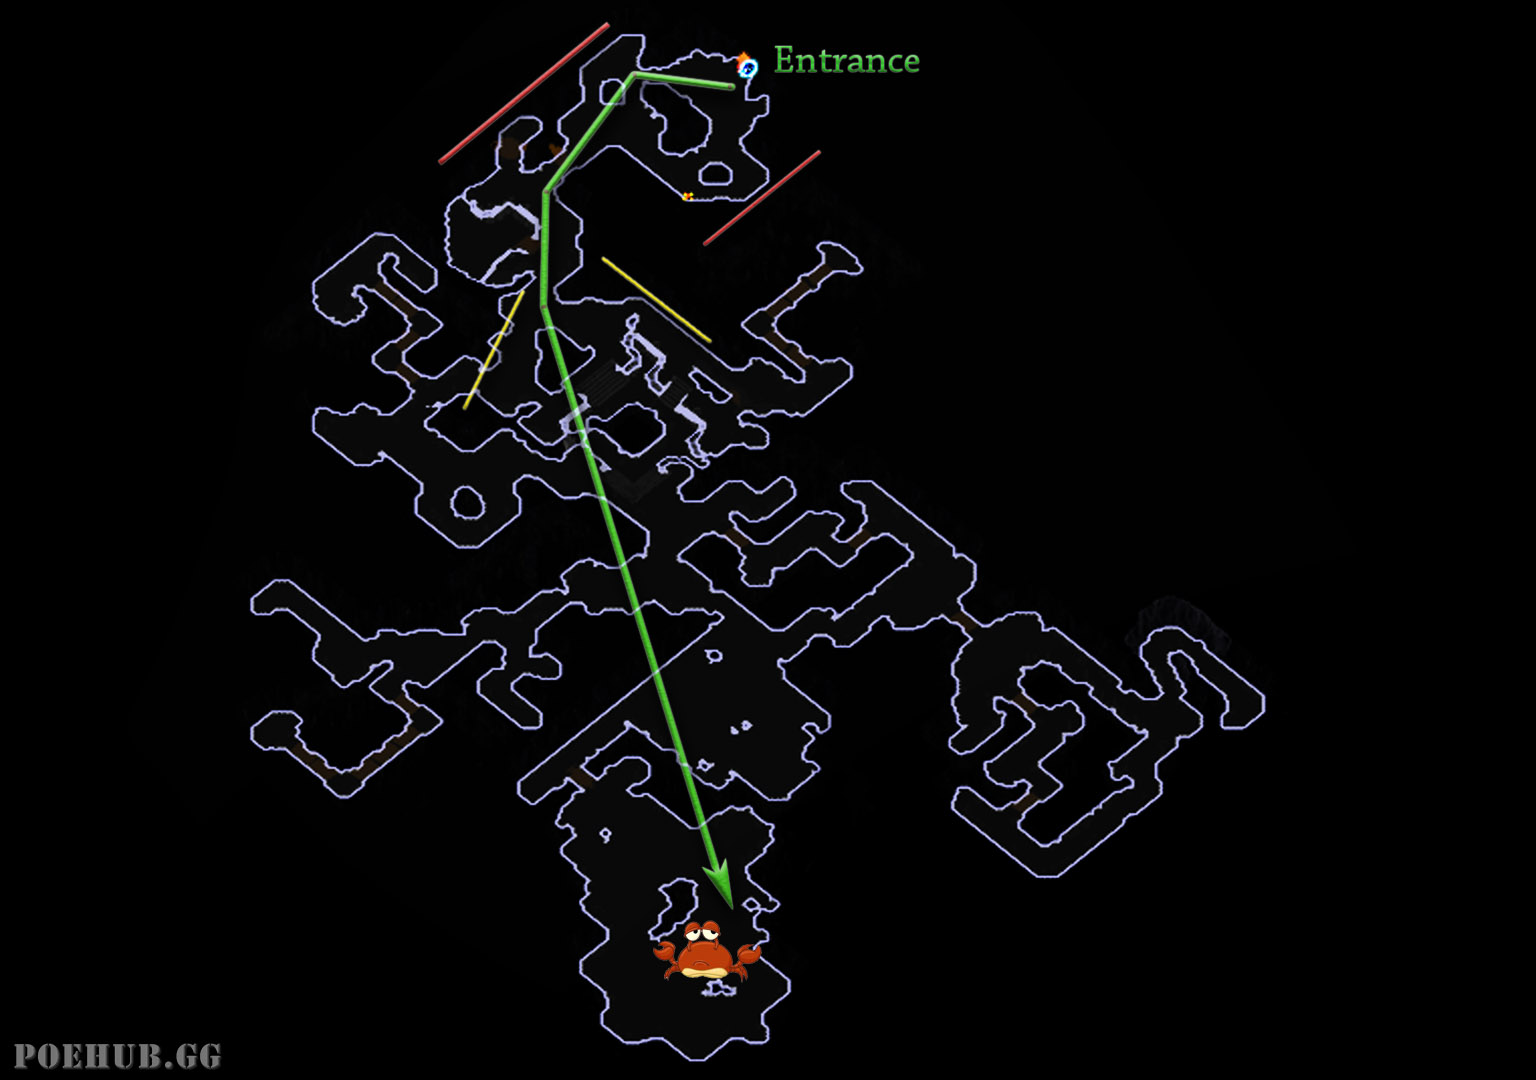
- If you don't see anything generated to the North-East of the start, you can safely rule out one layout (Bottom).
- By taking one step directly towards South-West you can see whether there is opening either in the South-East or North-West side of the entrance. If you see a opening in the South-East side, always go towards that unless you see area generated in the North-East of the starting area behind the entrance.
- After you travel south a bit, you can see that the area starts to open to East and West, but allows you to continue going South. You always want to stay in the middle path to avoid deadends.
# Bottom
In the Bottom layout we start at the bottom of the instance, and exit is always directly North of the start.
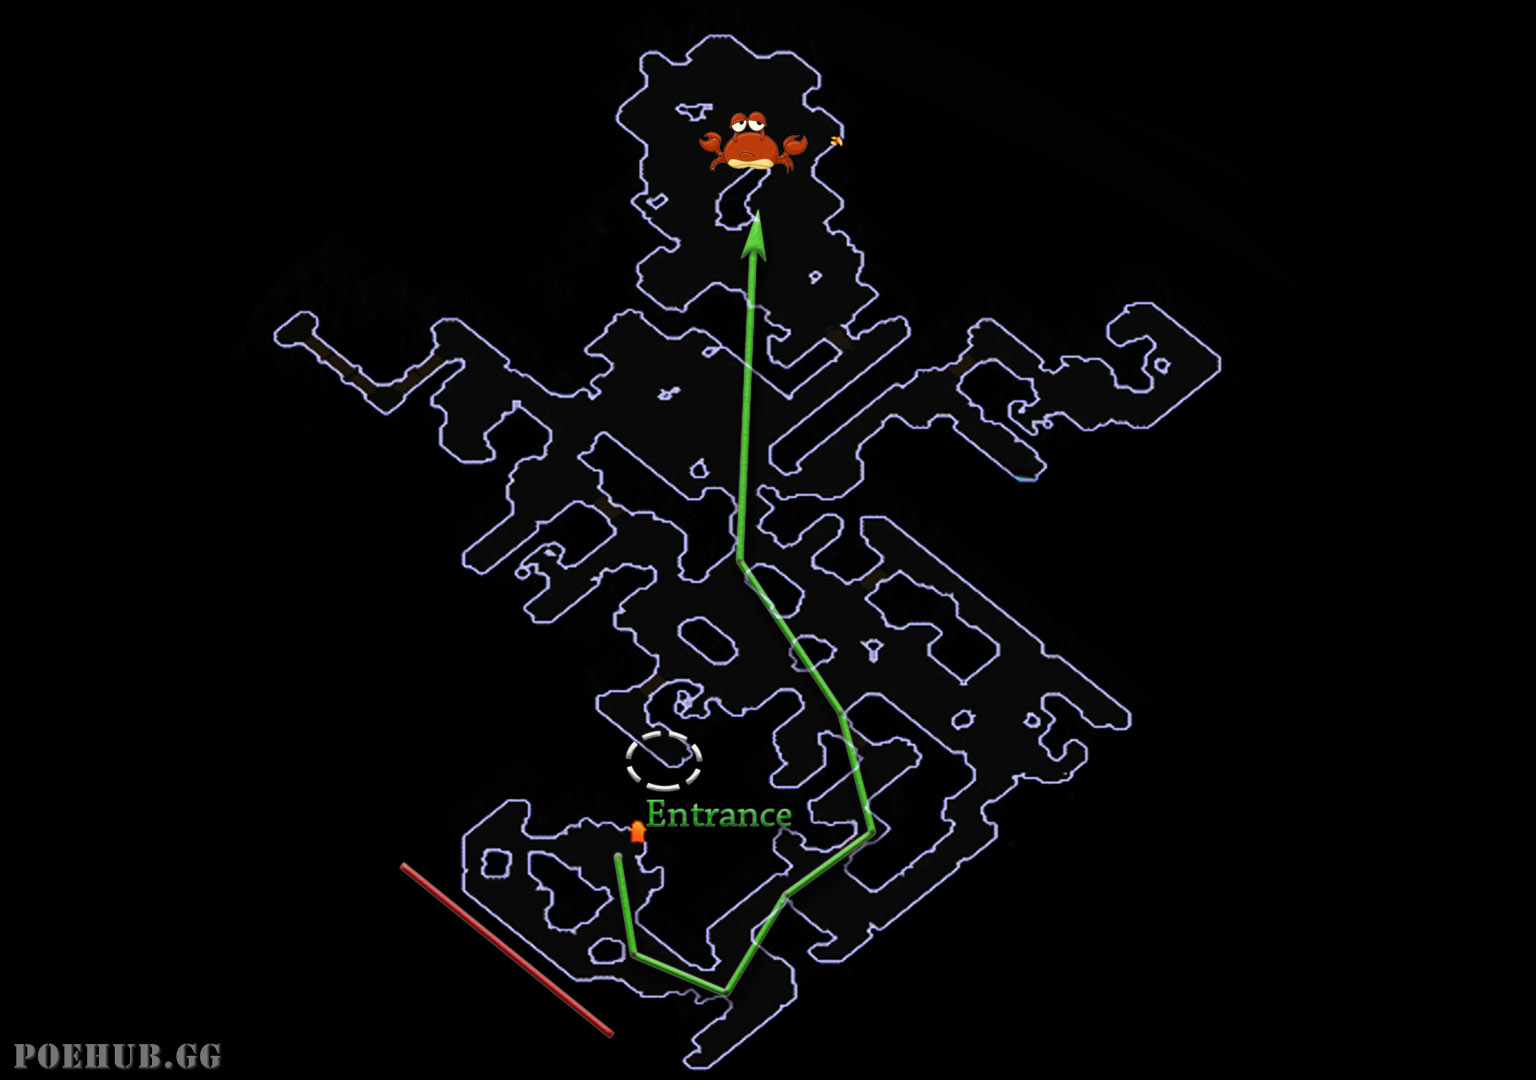
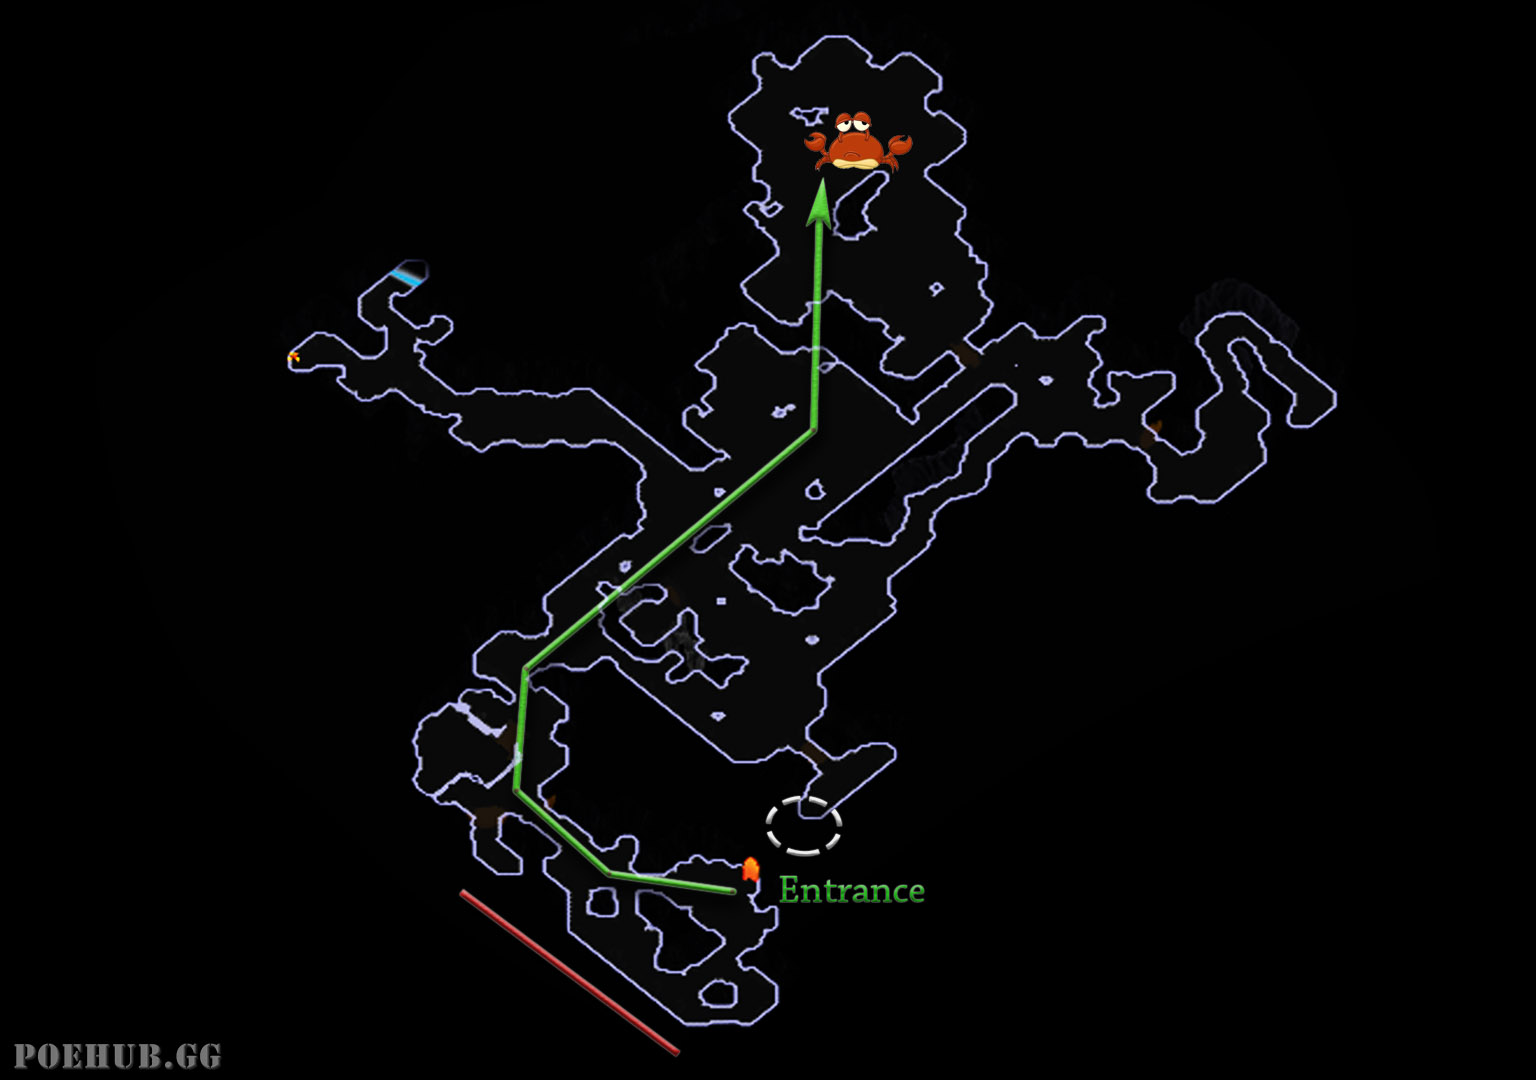
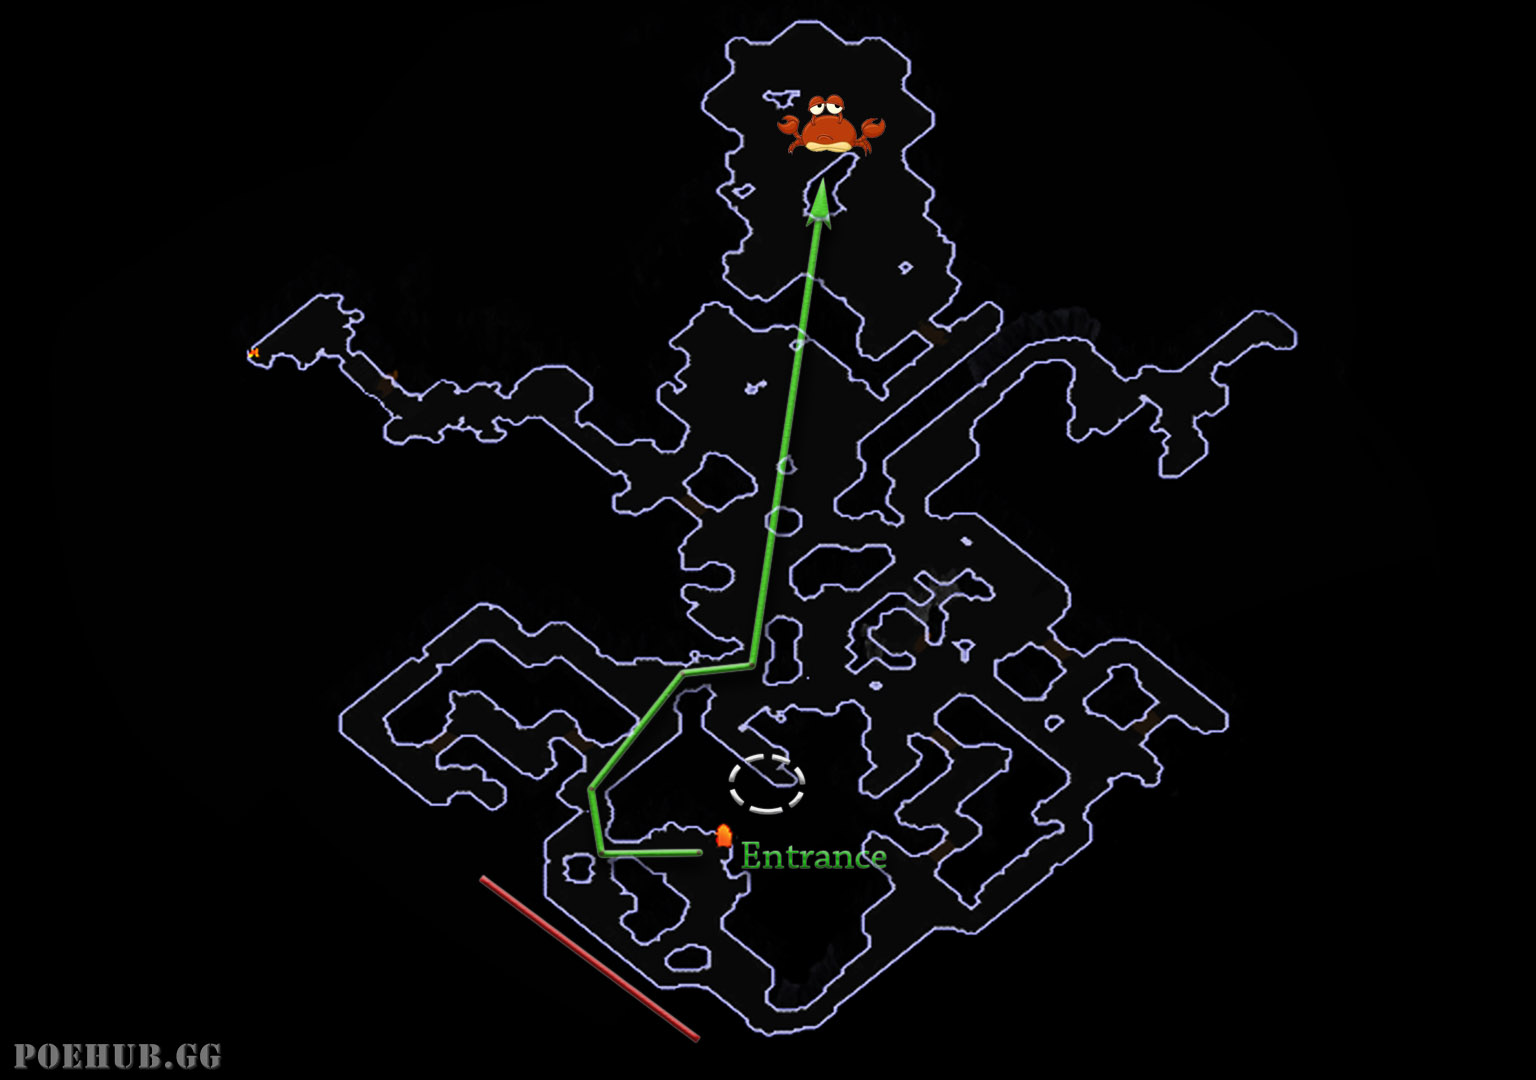
- Probably the easiest layout to recognize, as you will always see something generated behind the entrance to North-East.
- If you notice there is something there, check if you can go frm the North-West side of the entrance towards North.
- If there is no opening in that wall, then you simply circle around from the South-East side instead.
# Left
In the Left layout we start in the left side of the instance, and exit is always directly East.
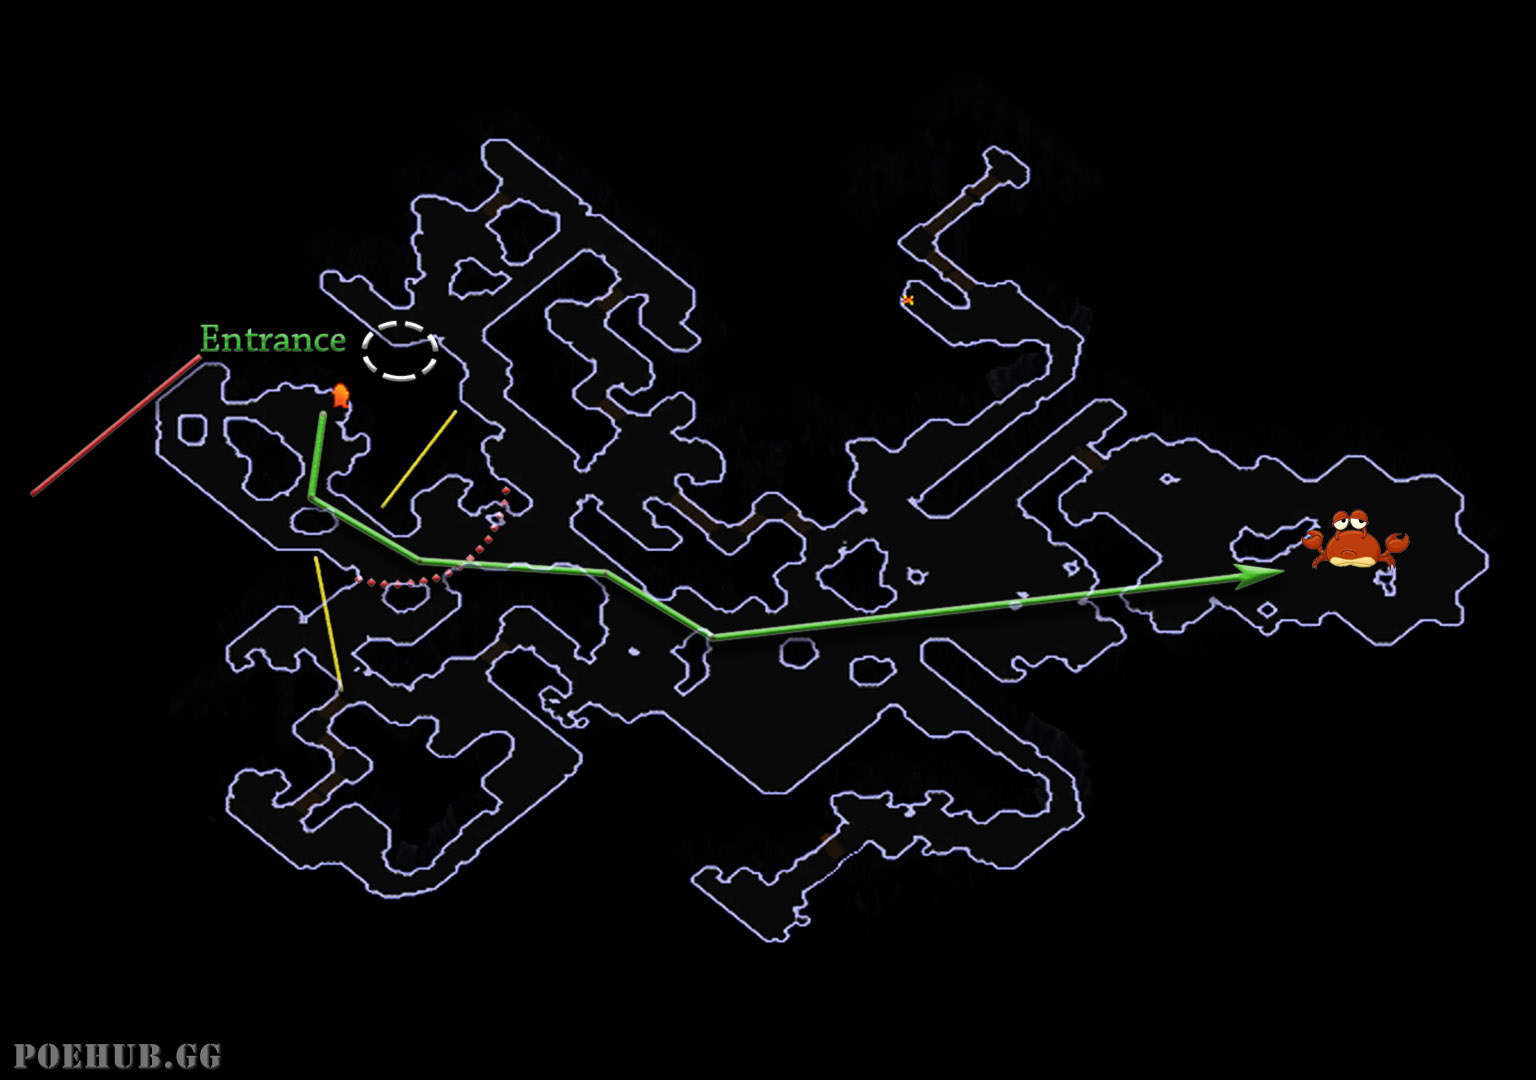
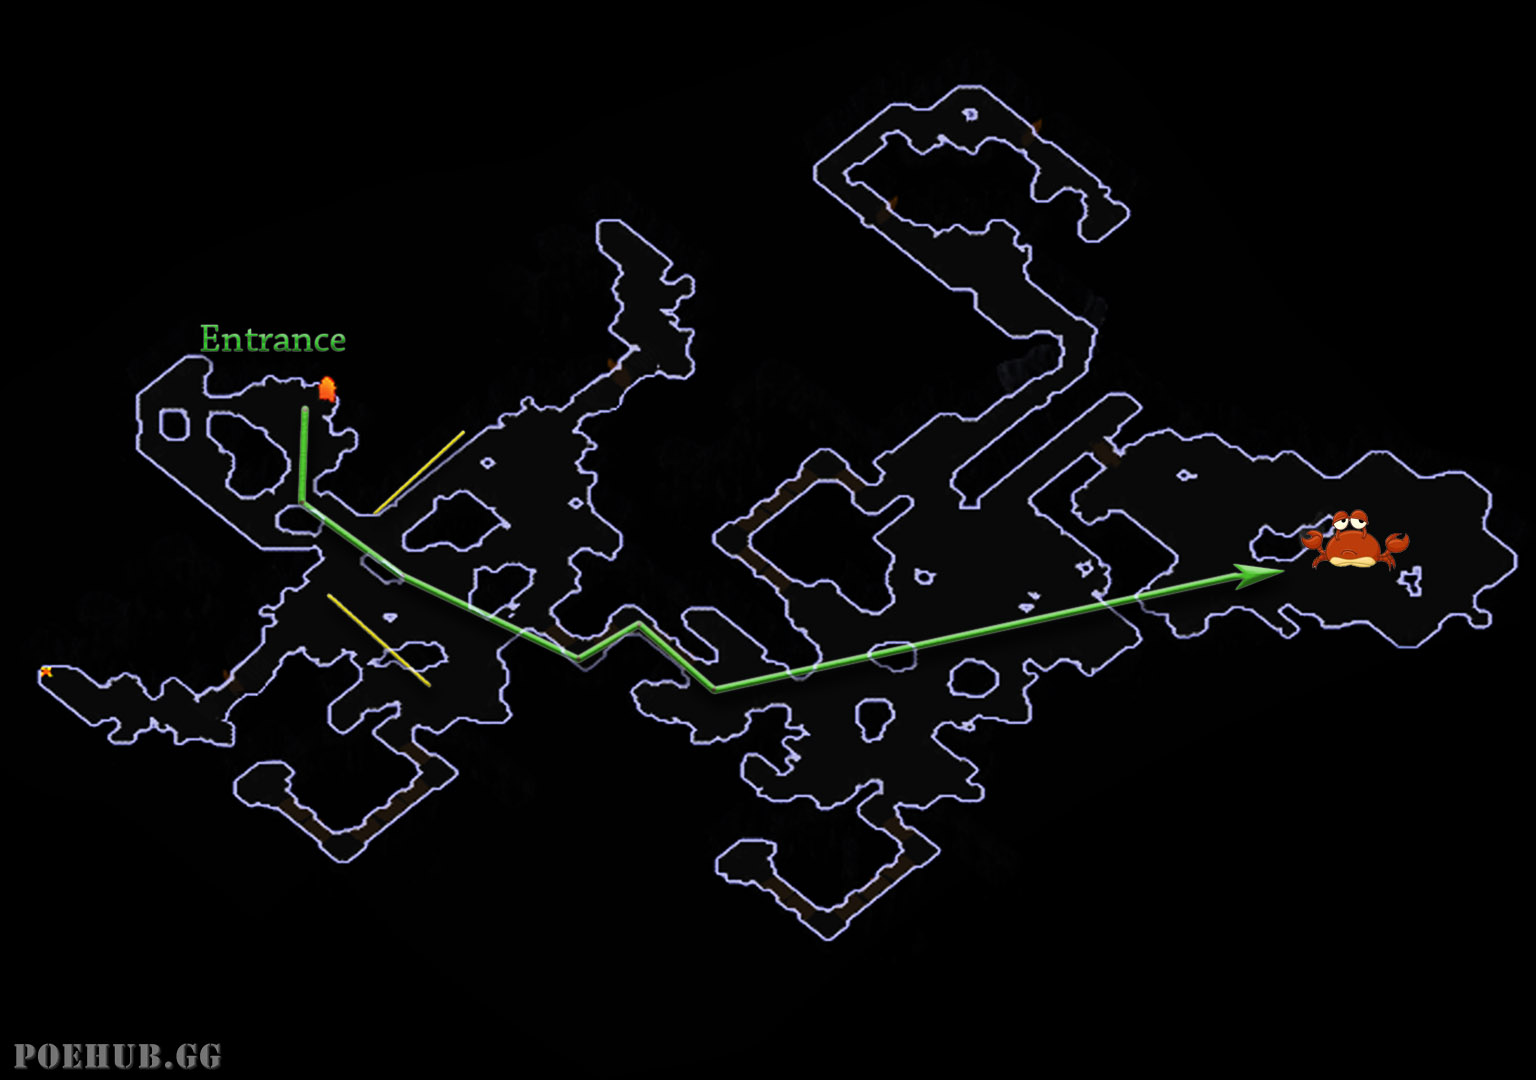
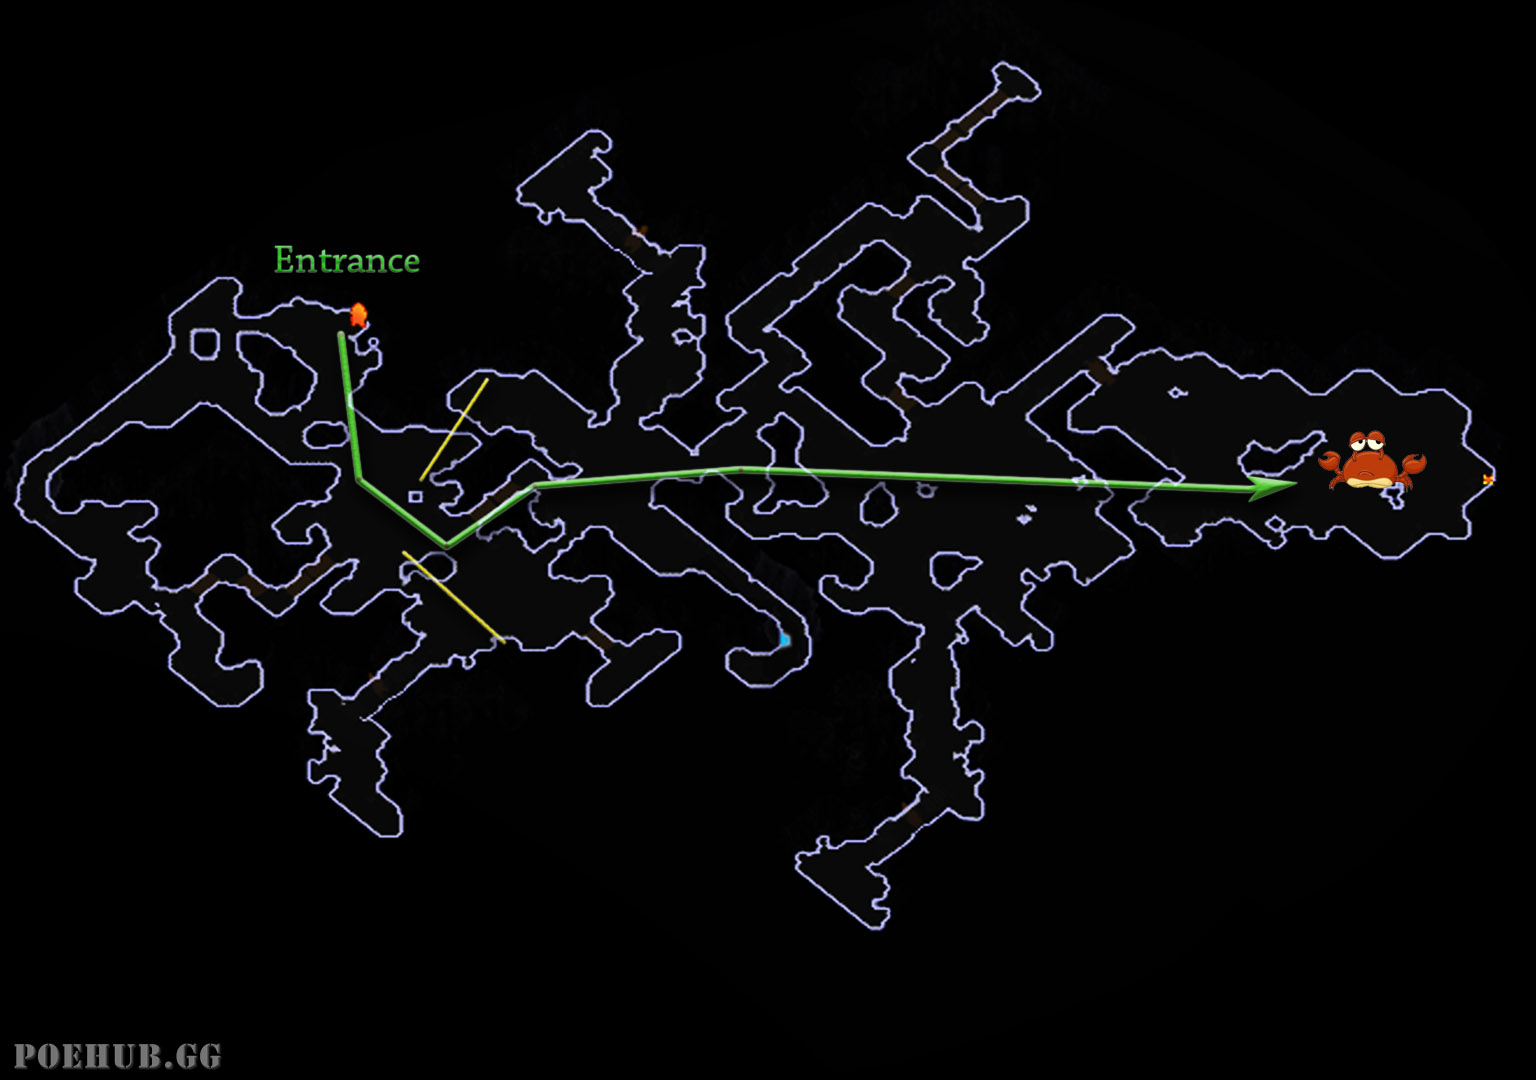
- Much like the previous layouts, you check if there is something in the North-East of the entrance.
- If there is, you again check if there is anything to the North-West of the entrance.
- If there isn't you then check if there is something to the North-West of the entrance.
- Note that in the 3rd picture there, the area continues towards South-West.
- You then go through the Southern opening and quickly notice how the area opens both to North and South, so you know to stick to the middle and head East.
- Quite often there is nothing to the South-East of the entrance (2nd and 3rd image).
- In these cases, you always go through the South-East opening.
# Right
In the Right layout we start in the Right side of the instance, and the exit is always across to the West.
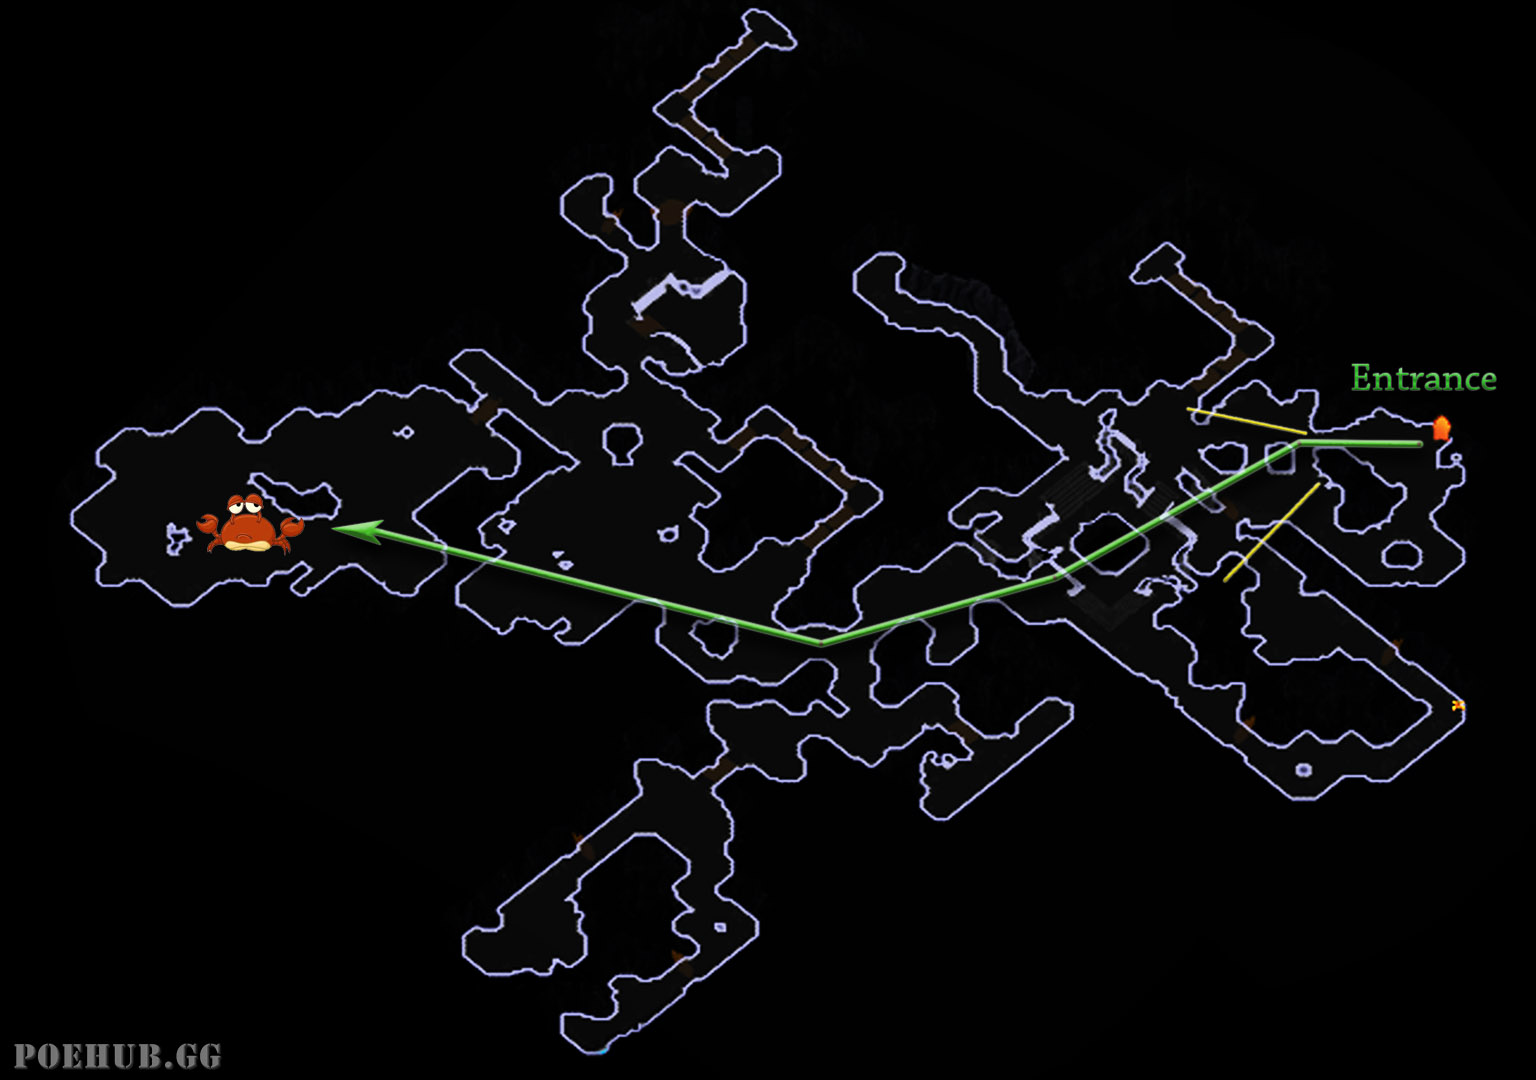
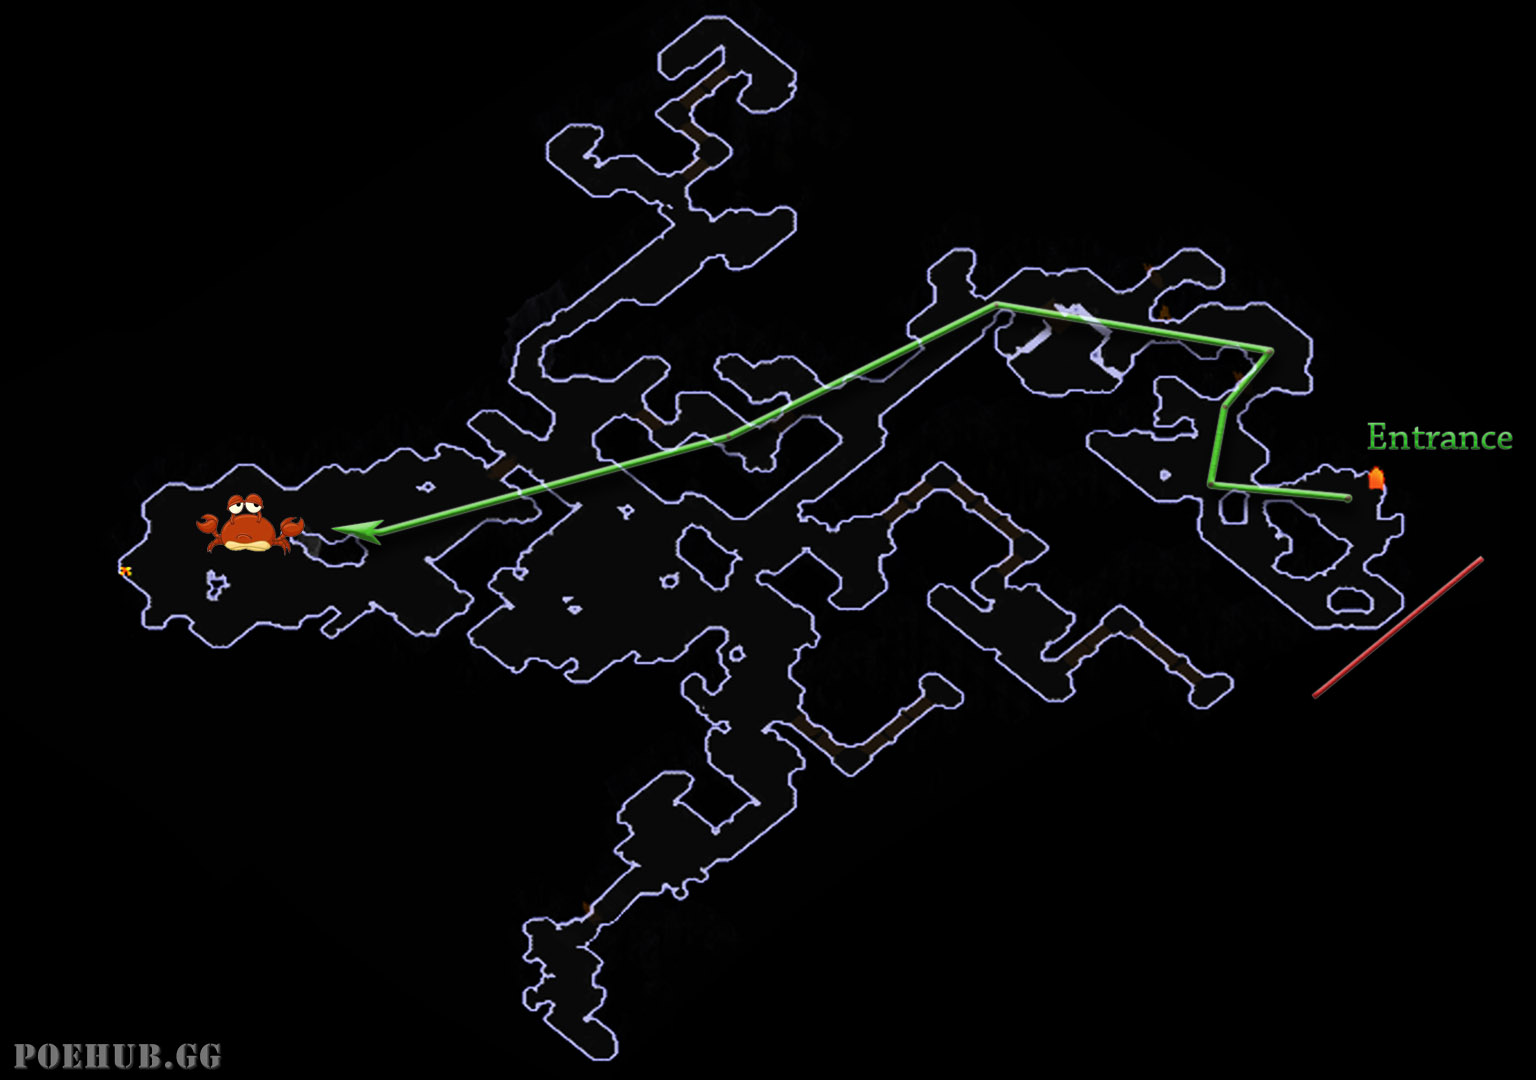
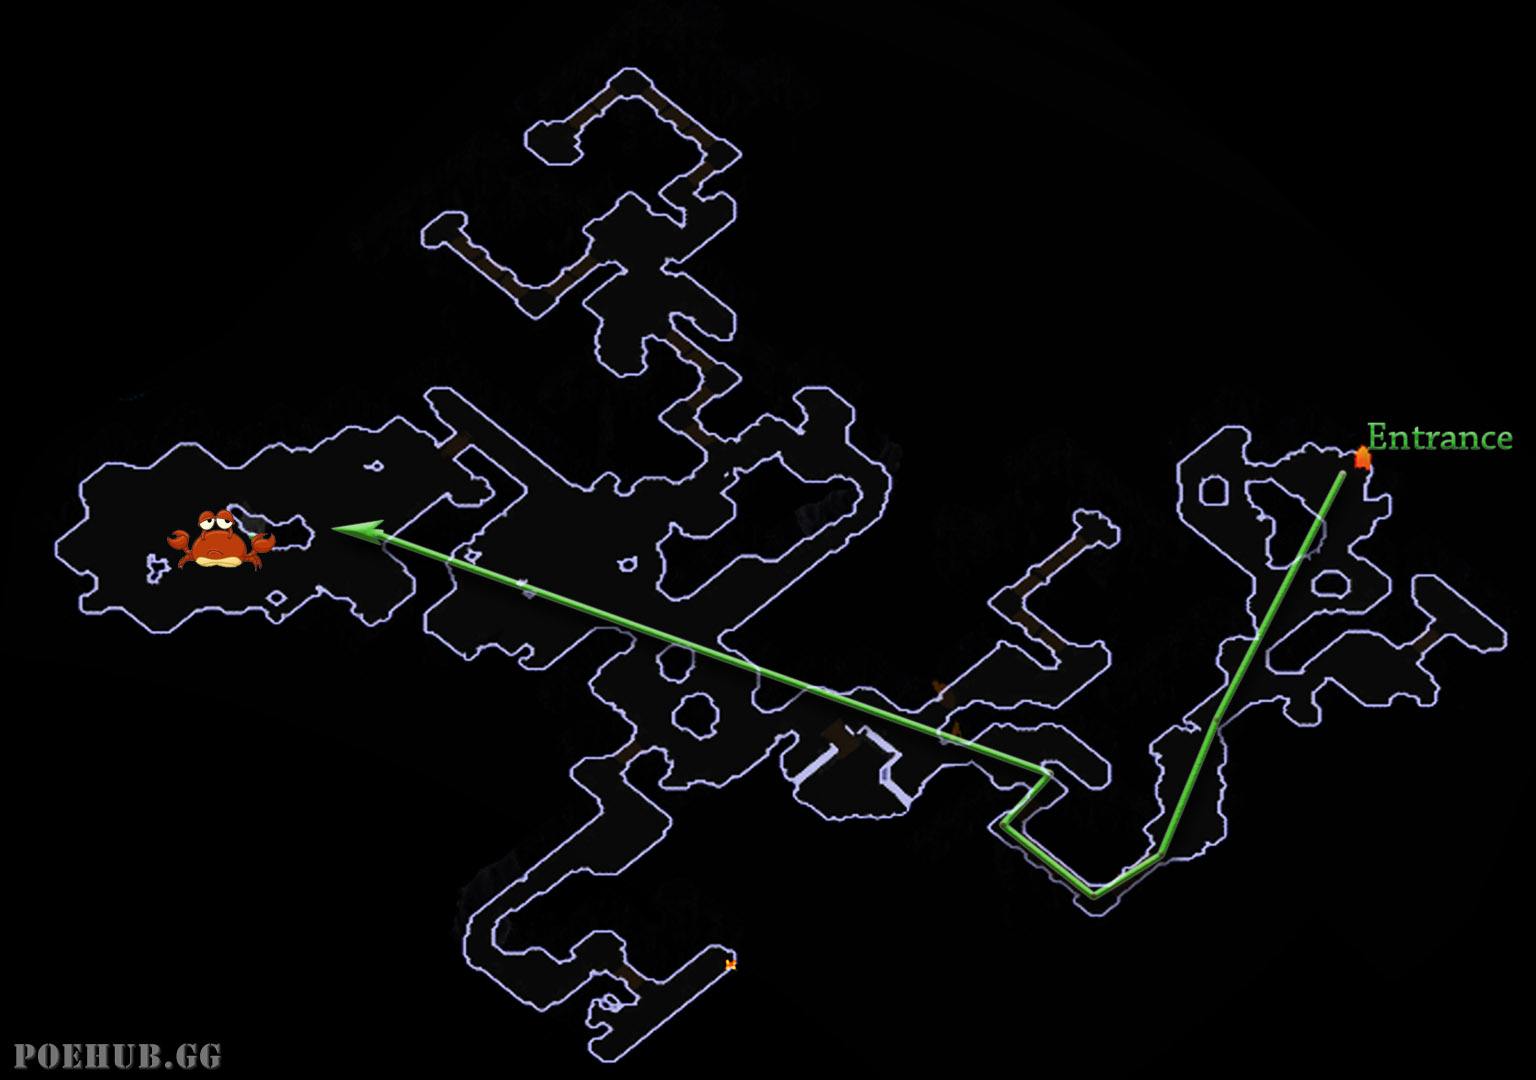
- And just like previous areas, we check the North-East of the entrance first. * Since there is nothing there, we then check if the area opens from the Southern side. * If it doesn't, you have to go through the North-Western side and you will quickly notice how the the area opens to South and North but also let's you keep going West. Then you just continue on that route.
- Quite often in this layout you travel a good while from the start before you come to the opening that splits towards multiple different directions, so it's easy to just keep on the same direction instead of taking those turns.
# Cheatsheet
Work in progress